
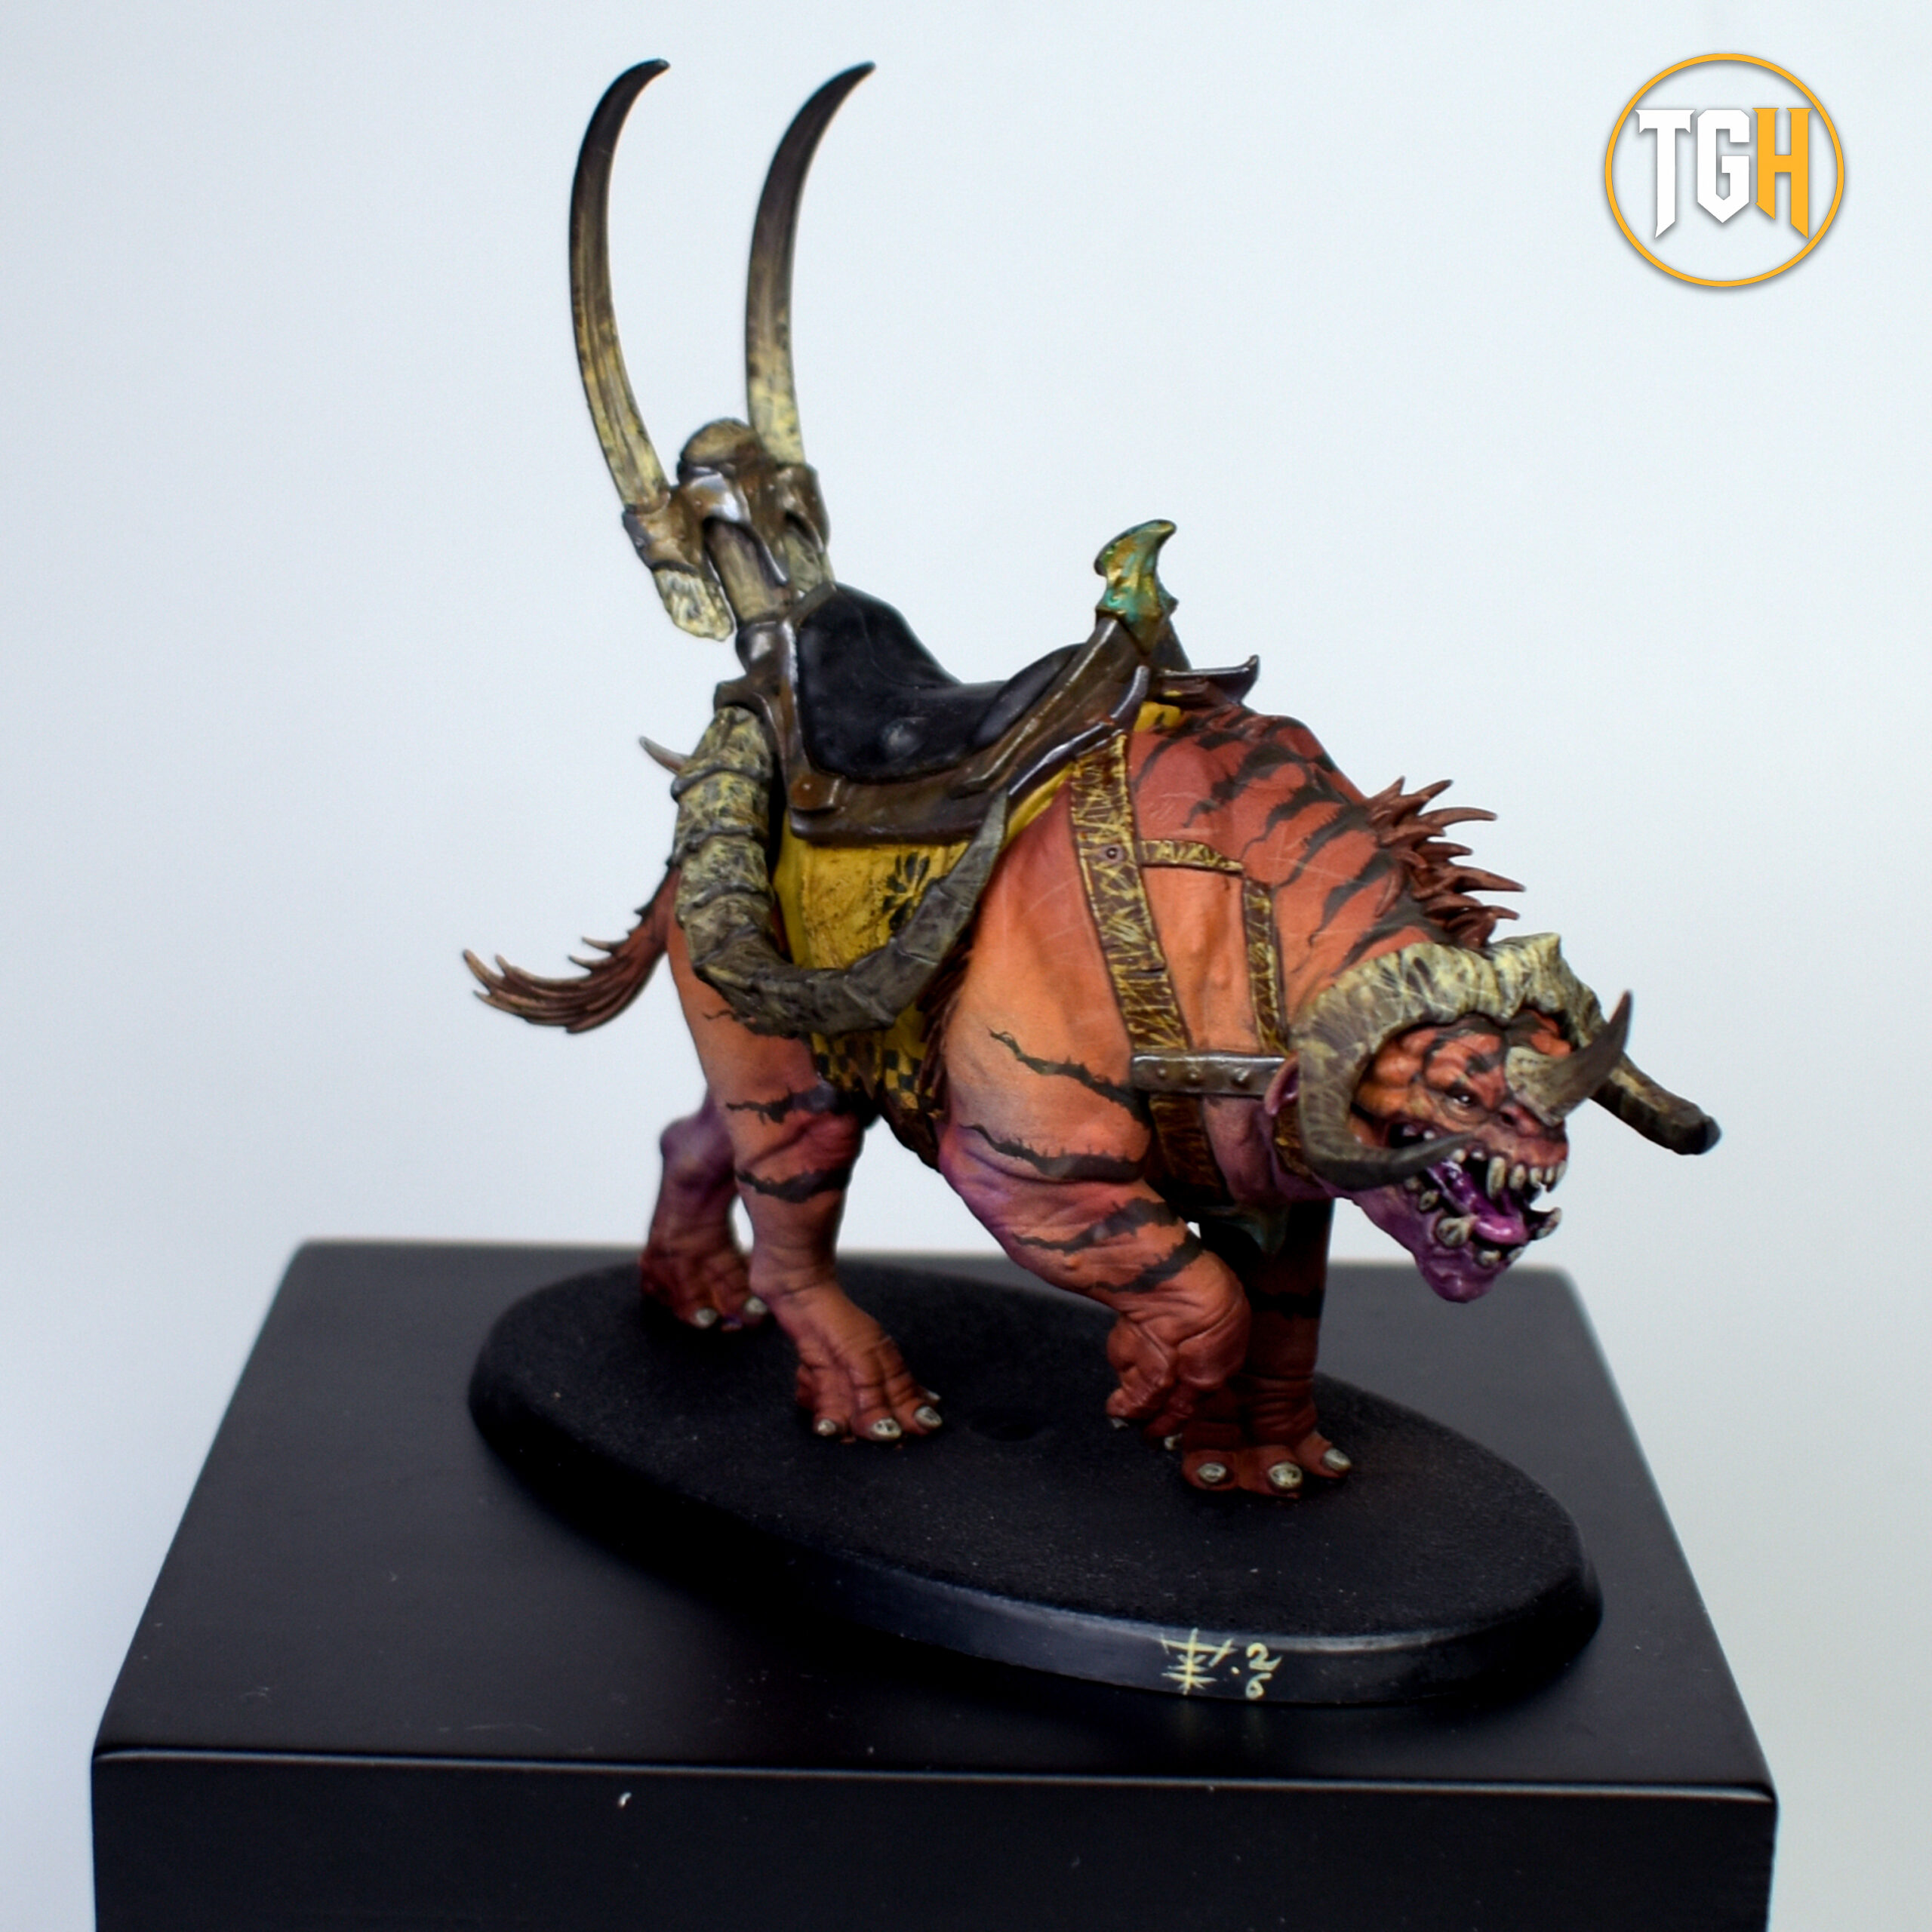
Painting guide: Ogor Mawtribes, maulbeast cavalry step by step

Hello there, painters! Welcome back to another tutorial from The Generals Hub. I’m ekkius, and following the resounding success of the previous ogre tutorial, we’re going to continue (and I’m delighted to do so) with this brilliant faction, this time with a slightly different theme: one of the new mounts from these new Ogor Mawtribes, the Maulbeast cavalry.
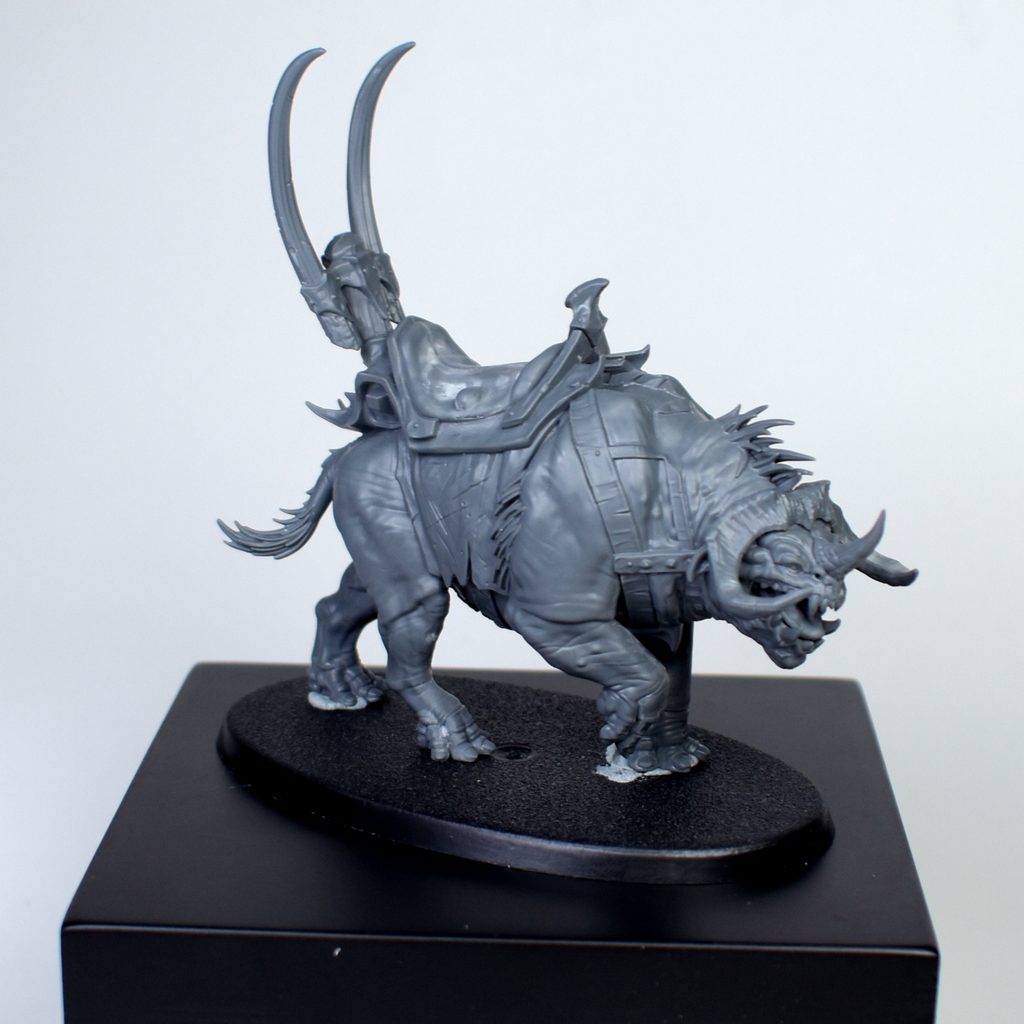
For this tutorial, I’ve assembled the entire mount, leaving the horned foot grips separate so I can paint them more easily. I’ve also chosen to attach the figure to the base using just blue tack, as this will help me paint the lower areas more effectively.
Primer
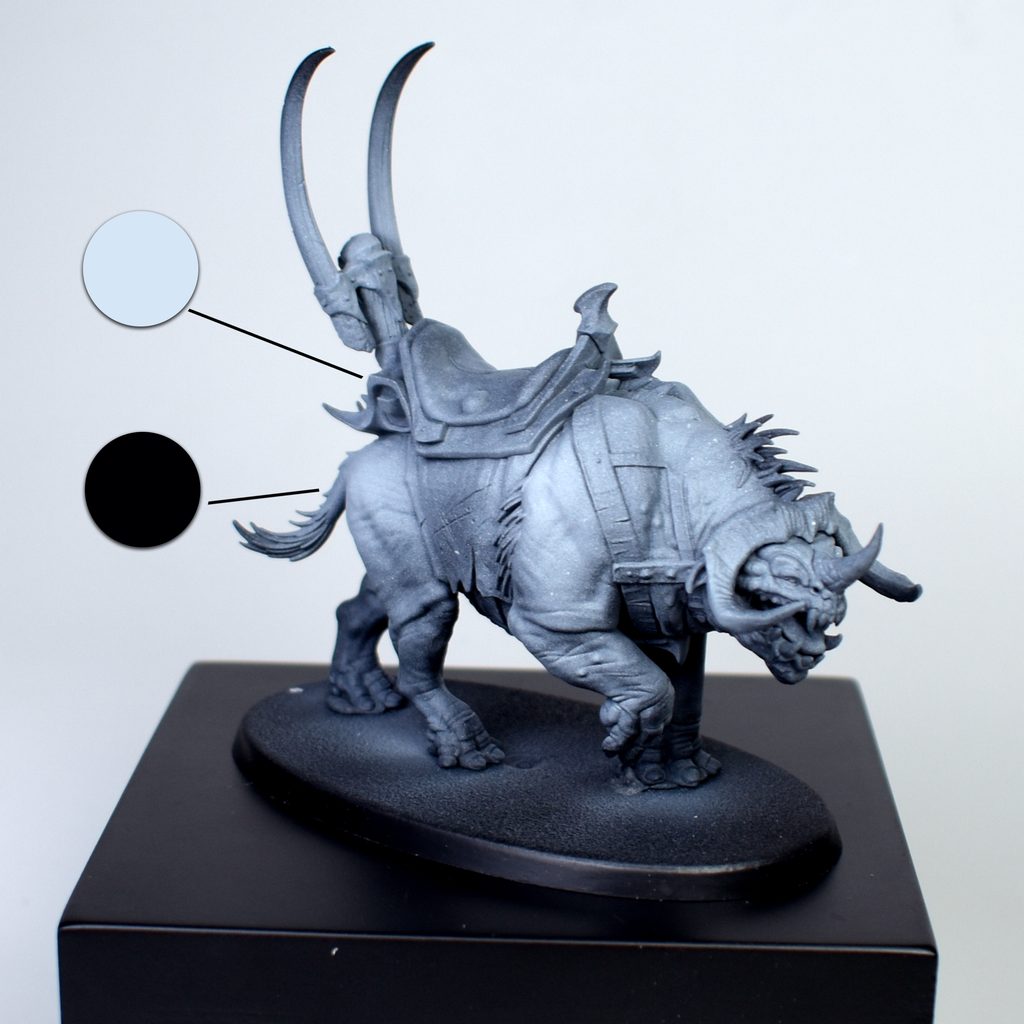
For the priming, I will use (as in the ogre tutorial) a double airbrush priming technique. I will first cover the entire miniature in black and then apply a top-down coat of white (spraying from above at an angle of approximately 45 degrees). For this, I will use the Ionic-0340 Black and Ionic-0341 White primers.
Base (Airbrush)
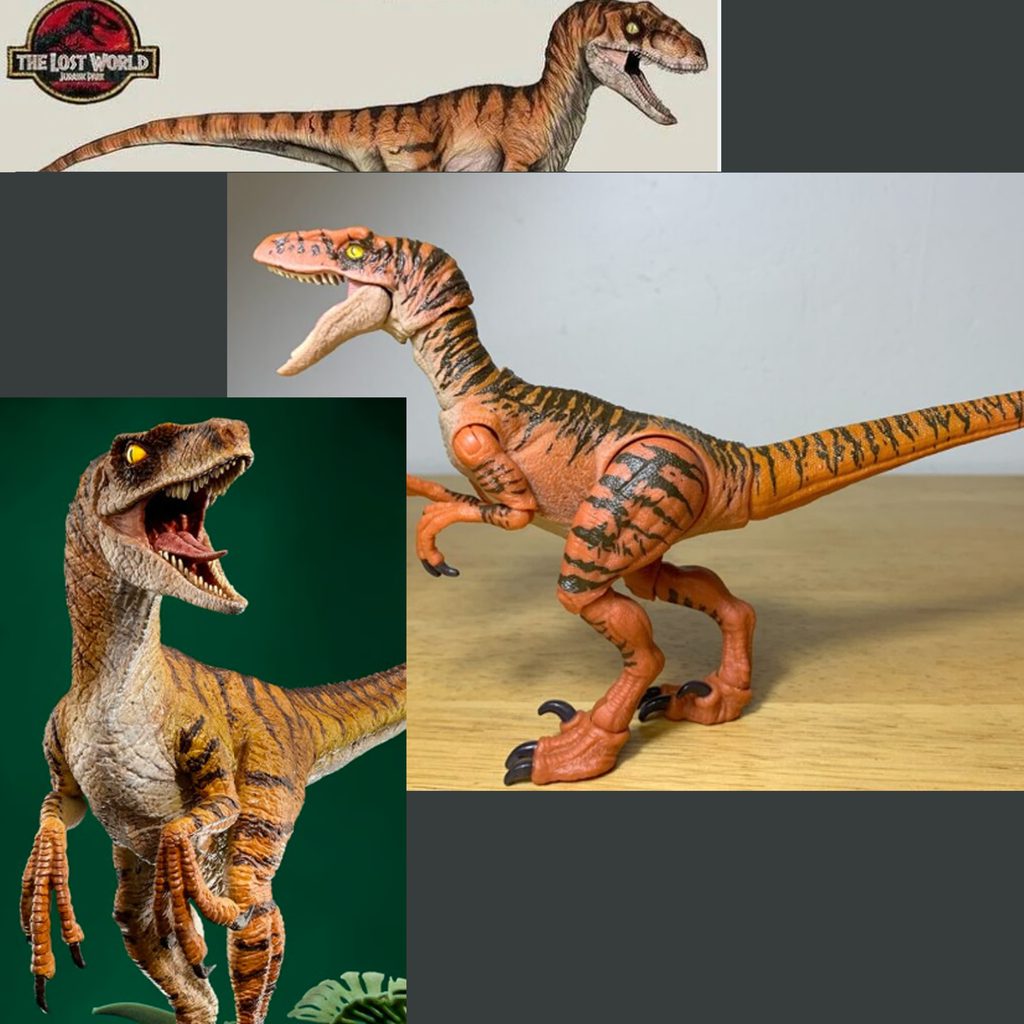
It’s a good idea to look for references when starting a new project. In my case, I wasn’t quite sure how to paint this cavalry, so I set about doing some research and looking for references of animals. When depicting the details of the miniatures, basing our work on existing patterns will help ensure our piece looks much better and more convincing. In my case, I’ve based my work on the patterns of the velociraptors from Jurassic Park.
As the skin is the dominant feature in this figure, I’m going to start by applying the base colours with an airbrush to save myself some valuable time. I’ll begin with the lower sections of the Maulbeast using Ionic-0163 Warm Grey, whilst for the upper sections I’ll use Ionic-0155 Light Rust.
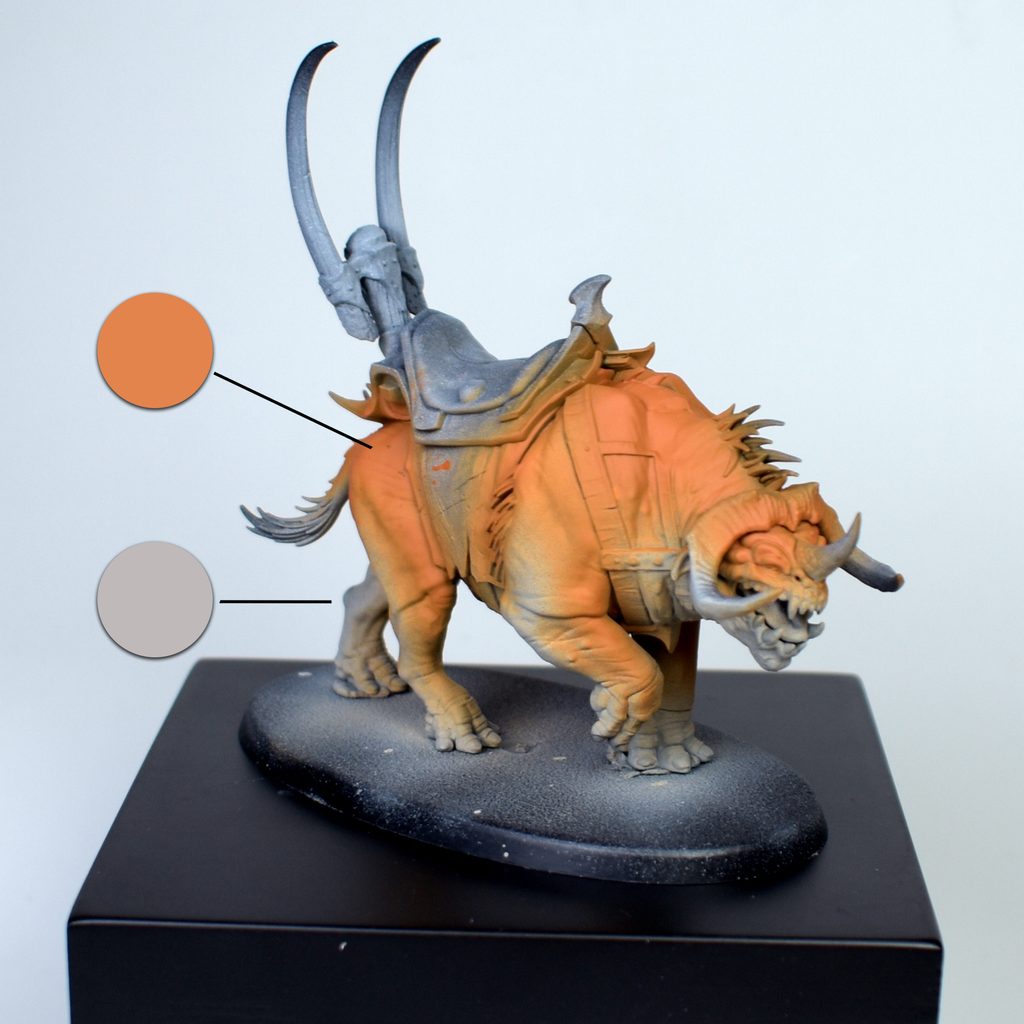
After that, I darken the upper parts of the Maulbeast’s back and the tips of its legs using Ionic-0153 Vermin Brown.
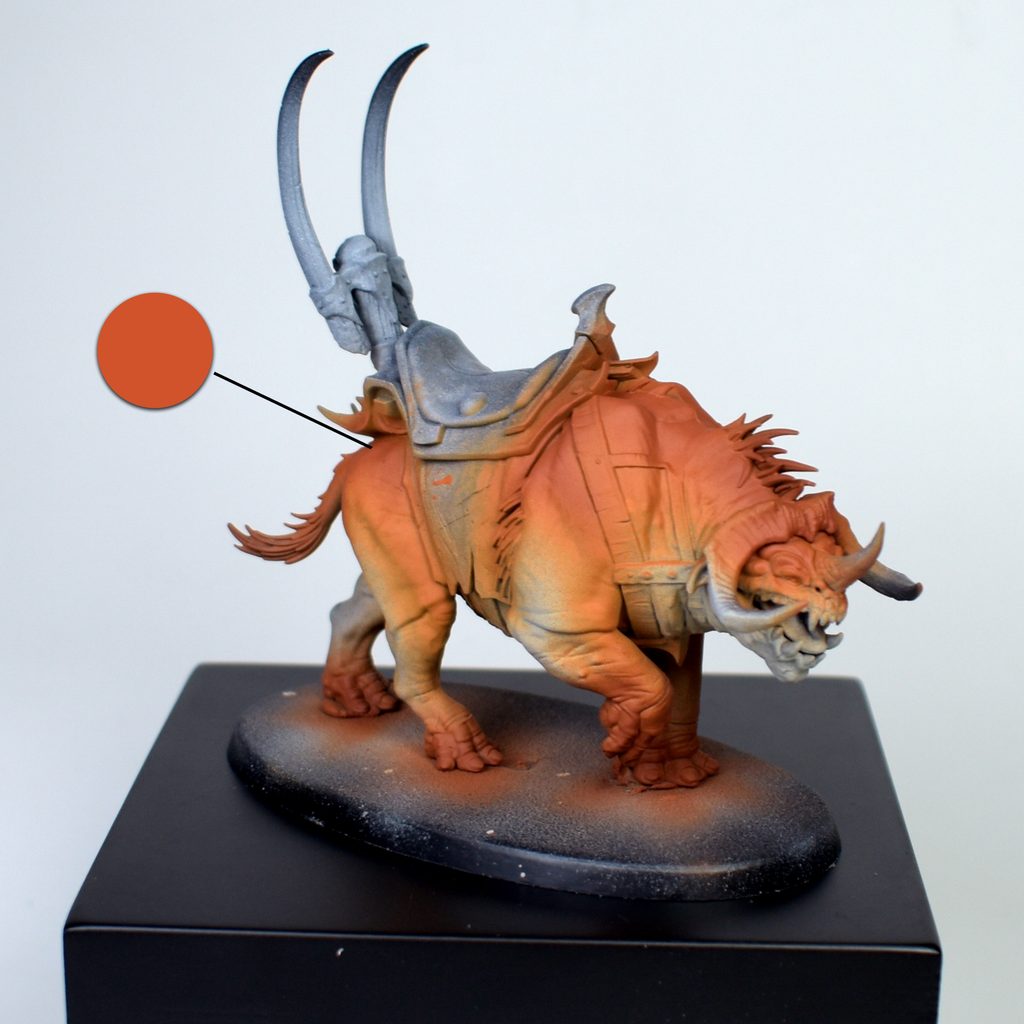
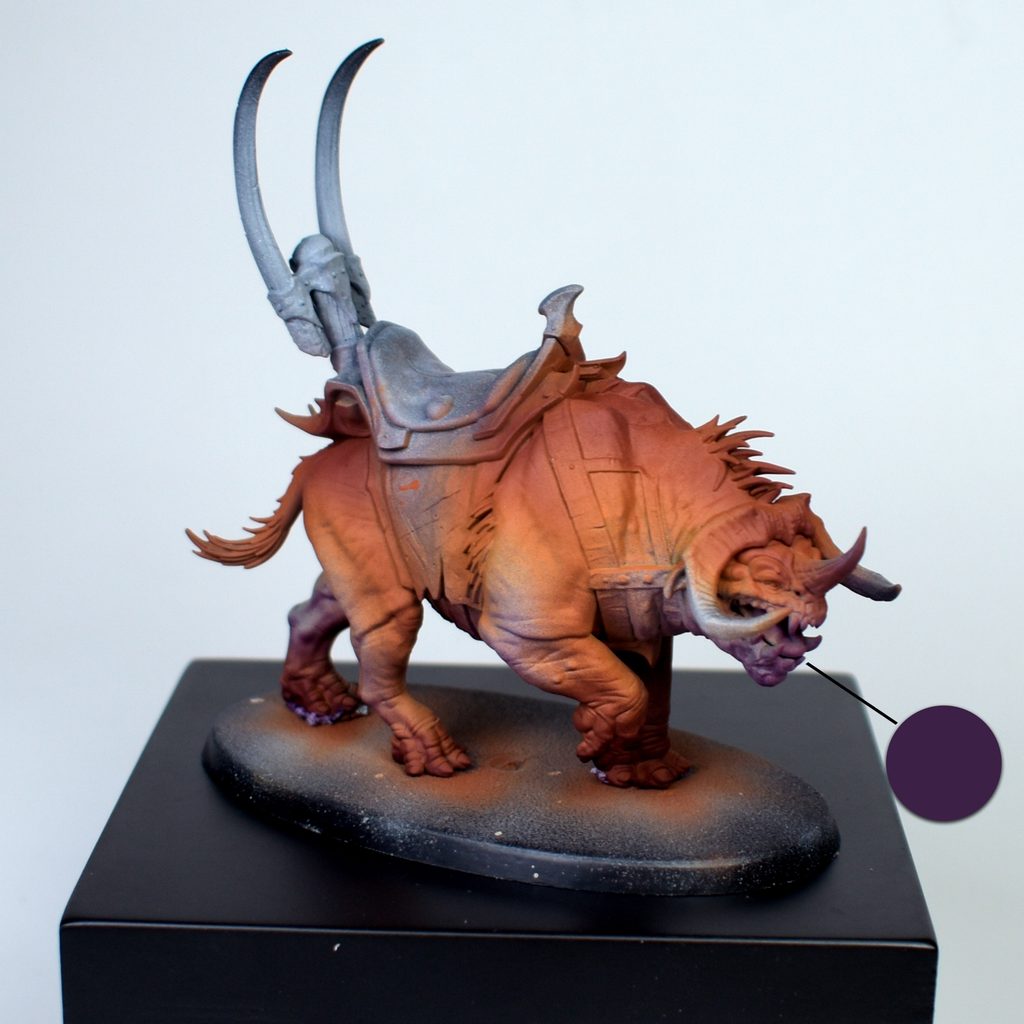
Finally, I’ll use the airbrush to apply a very thin coat of Ionic-0074 Dark Violet to the lower parts and a little bit to the upper parts, to blend these shades with the ogres’ skin in my army (as we covered in the previous tutorial). This will help to cool down those warm orange tones on the Maulbeast a little; to paint it more easily, I’ll remove the figure from its base. After that, I’ll reattach the miniature to the base and get stuck in with the brush.
Base (Brush)
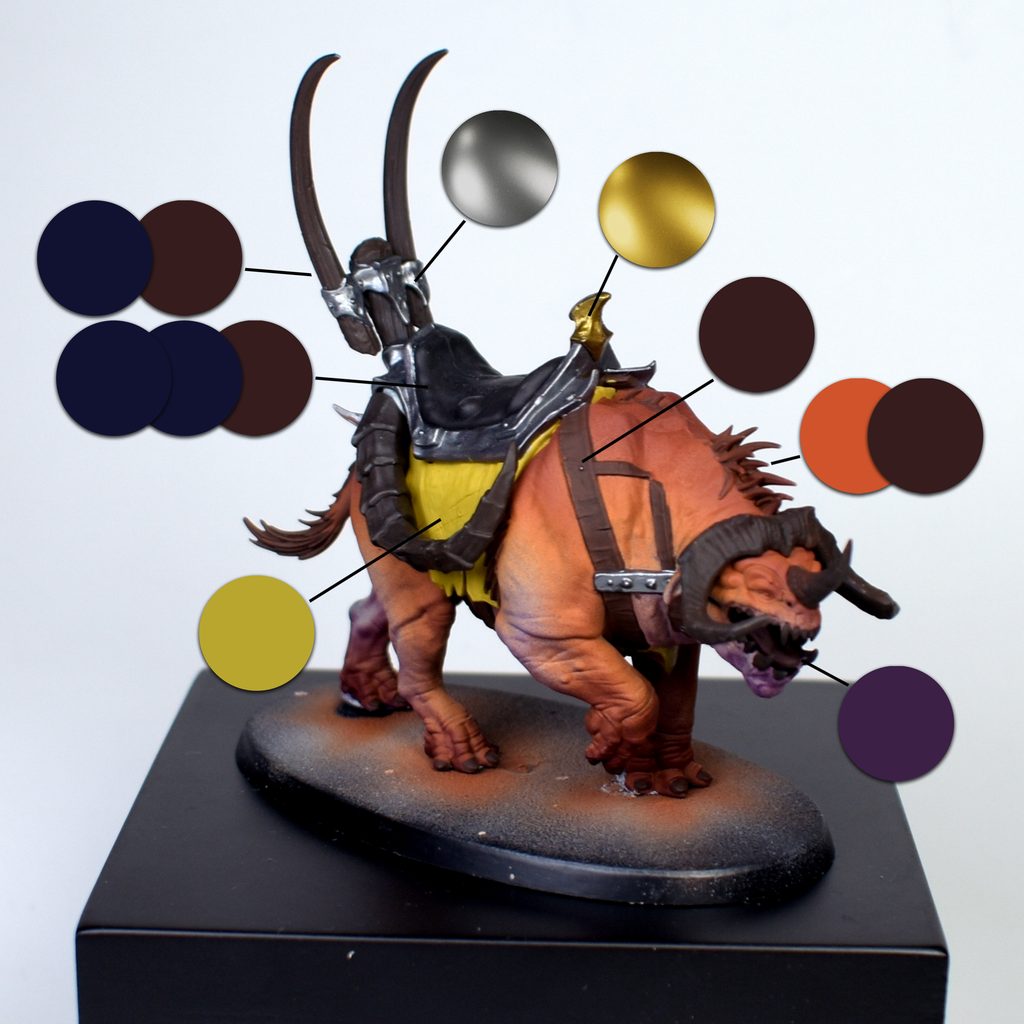
I’m starting to paint the other elements.
I’ve painted the horns, teeth and claws using a 1:1 mix of Ionic-0161 Burnt Umber and Ionic-0171 Dark Grey.
The seat has also been painted using a mix of Ionic-0161 Burnt Umber and Ionic-0171 Dark Grey, but this time in a 1:2 ratio.
As for the leather straps, I’ve only used Ionic-0161 Burnt Umber.
For the metal parts, I’ve used Ionic-0819 Burnished Metal and Ionic-0180 Brass.
The fabric has been painted following the method from the previous tutorial, with a couple of coats of Ionic-0024 Khaki.
Finally, I painted the inside of the mouth and tongue with a base coat of Ionic-0074 Dark Violet, and the loose hairs on the bridle with a mixture of Ionic-0153 Vermin Brown and Ionic-0161 Burnt Umber, thinned with water to give it a wash-like consistency.
As you’ve seen, I’ve used a lot of Ionic-0161 Burnt Umber; I think it’s one of the best colours in the range, as it provides good coverage and is perfect for all sorts of situations. If you’re a fan of GW’s Rhinox Hide, I strongly recommend you give this paint a go.
Highlights (I)
I’m going to gradually add more colour and depth to the different areas of the miniature.
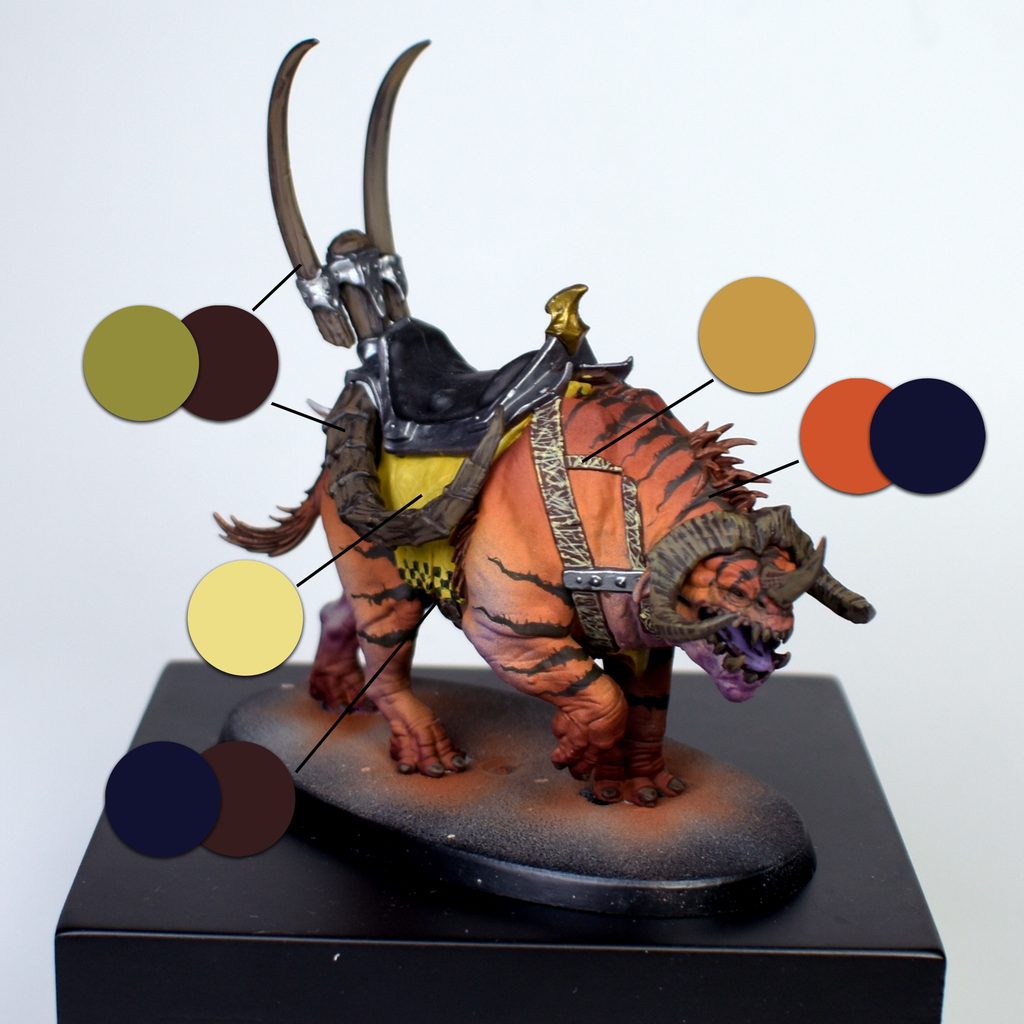
I’ll start with the leather straps: using Ionic-0029 Golden Flesh, I’ll outline the edges of the straps and add lines and dots to create a worn texture.
For the other brown areas, including teeth, claws and horns, I’ll be outlining and adding texture with a 1:1 mix of Ionic-0161 Burnt Umber and Ionic-0017 Plasma Green.
I highlight the yellow fabric with Ionic-0012 Vanilla and paint some chequered patterns using a 1:1 mixture of Ionic-0171 Dark Grey and Ionic-0172 Black.
I paint the fur lines using a 1:1 mix of Ionic-0171 Dark Grey and Ionic-0153 Vermin Brown. In this case, using a colour that’s already present on the figure (Vermin Brown) helps these fur lines look more natural. To finish, I apply this same mixture, slightly more diluted, around the eyes and nose to add a bit of contrast.
Highlights (II)
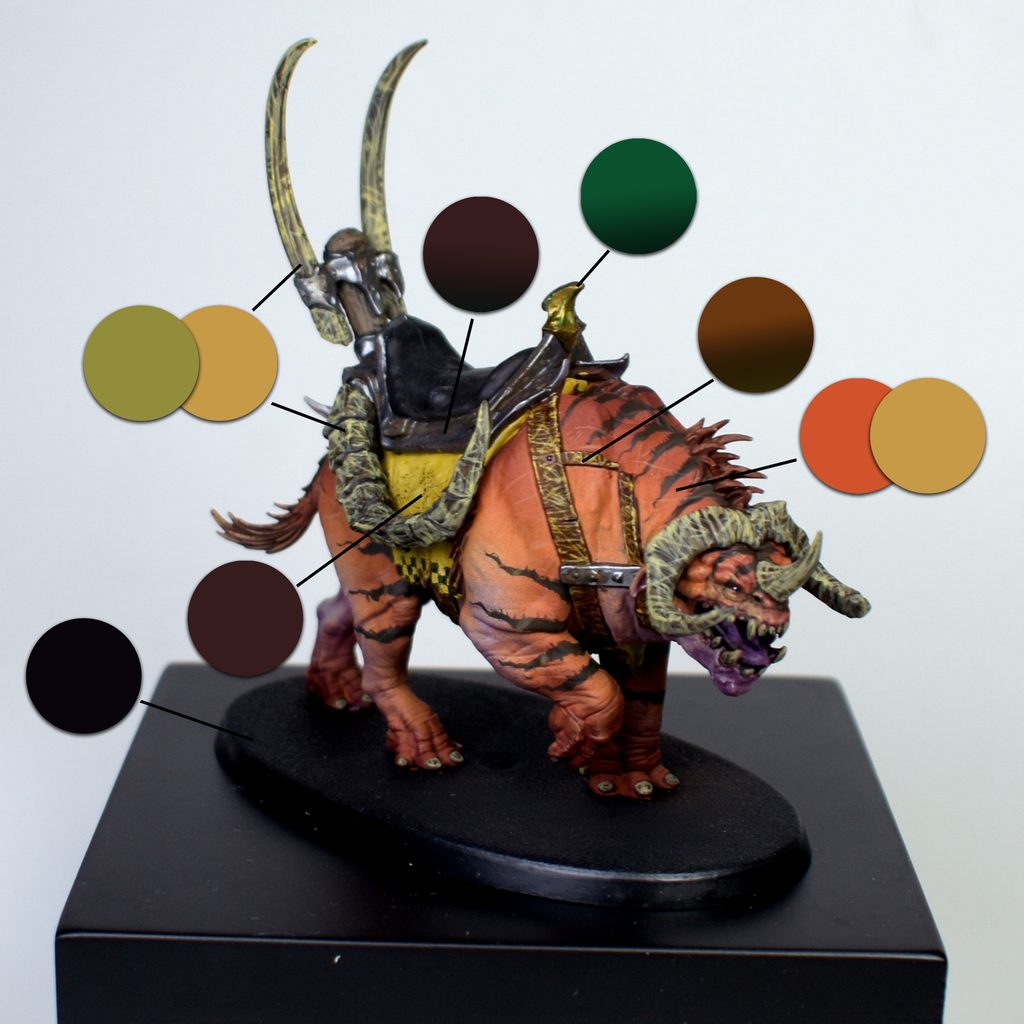
I continue by applying a coat of Ionic-0172 Black to the base, then I apply Ionic Acrylic Ink Maple, thinned with water, to the areas with the leather straps to create the leather effect we’re aiming for, thanks to the ink’s satin finish. I also use Ionic Green Ink on the brass coloured surfaces to vary the shade of the metal.
I use Ionic-0161 Burnt Umber, applied with a sponge, for the grime on the fabrics, and Citadel Typhus Corrosion to add a little texture to the metals.
As for horns, teeth and claws, I apply a 1:1 mixture of Ionic-0029 Golden Flesh and Ionic-0017 Plasma Green in fine strokes, making sure to outline all areas clearly.
I mix Ionic-0029 Golden Flesh and Ionic-0155 Light Rust to apply fine strokes in different directions, adding extra texture to the maulbeast’s fur. I also use this mixture to highlight the face a little more.
Highlights (III)
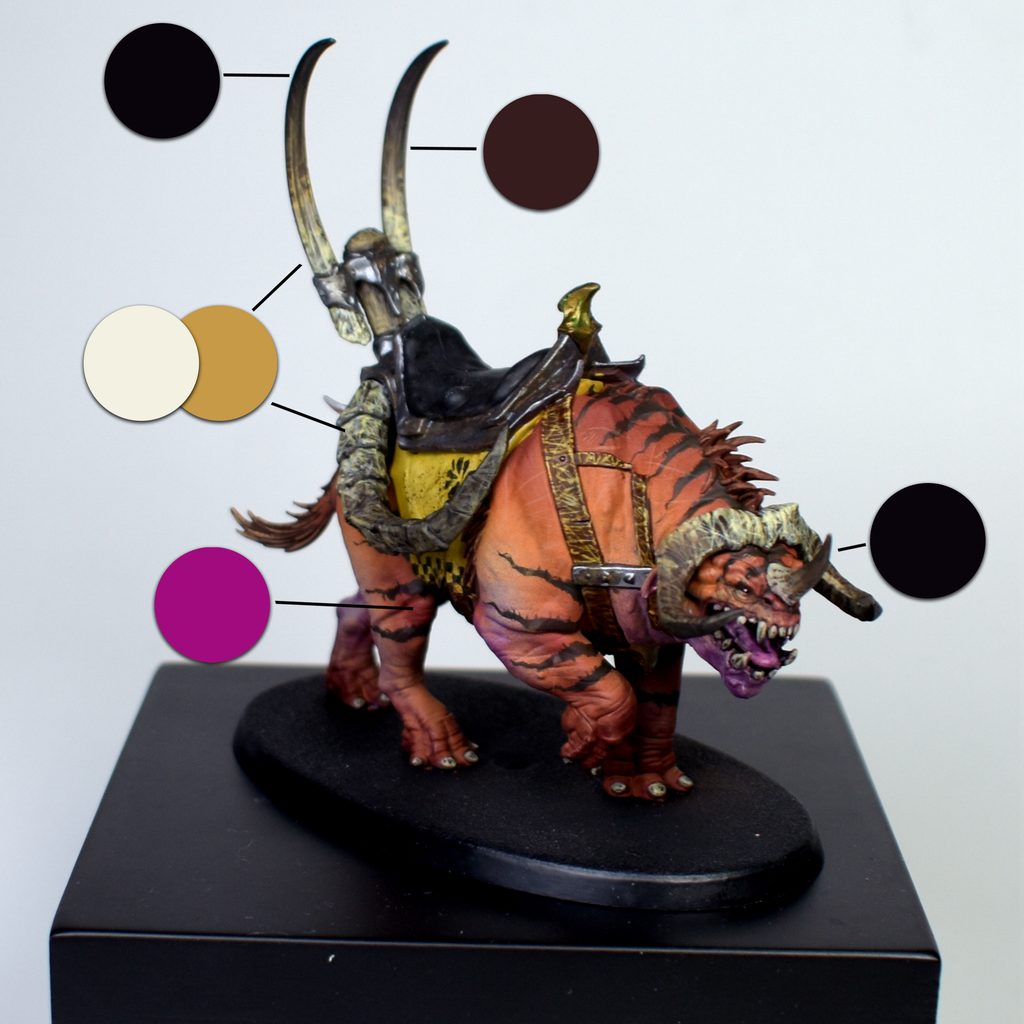
I continue painting the horns and teeth, this time using a 1:1 mix of Ionic-0029 Golden Flesh and Ionic-0001 White across their entire surface, before airbrushing a very diluted layer of Ionic-0172 Black onto the tips of the horns only. To restore the medium brown tone, I apply Ionic-0161 Burnt Umber with a brush in a glazing dilution, starting from the middle and working towards the black tip of the horns. As the layers of this brown are thin, this will allow us to see the textures we previously highlighted with the lighter colours.
I emphasise the beast’s knees and joints a little more with an airbrush mixture of 1:1 water and Ionic Magenta ink, applied in very thin layers.
Oils and varnish
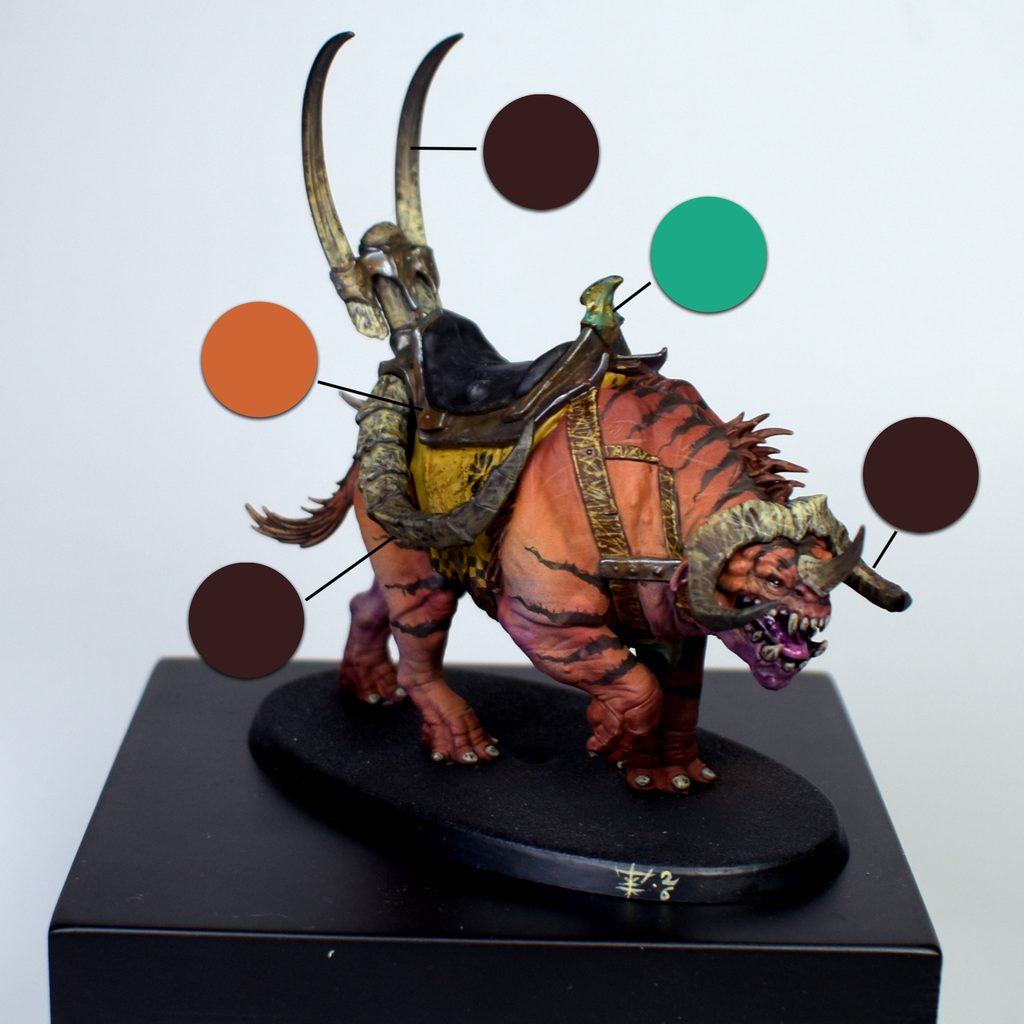
As a final step, I apply a brown oil paint diluted with enamel thinner to most of the figure’s raised areas and metal parts. I do the same for the brass areas, using a turquoise oil paint. I add rust effects with orange oil paint to the metal parts. Finally, I apply a gloss varnish to the eyes and tongue.
And that’s it!
Final pics
I hope you’ve enjoyed the tutorial.
See you next time, everyone!
ekkius.
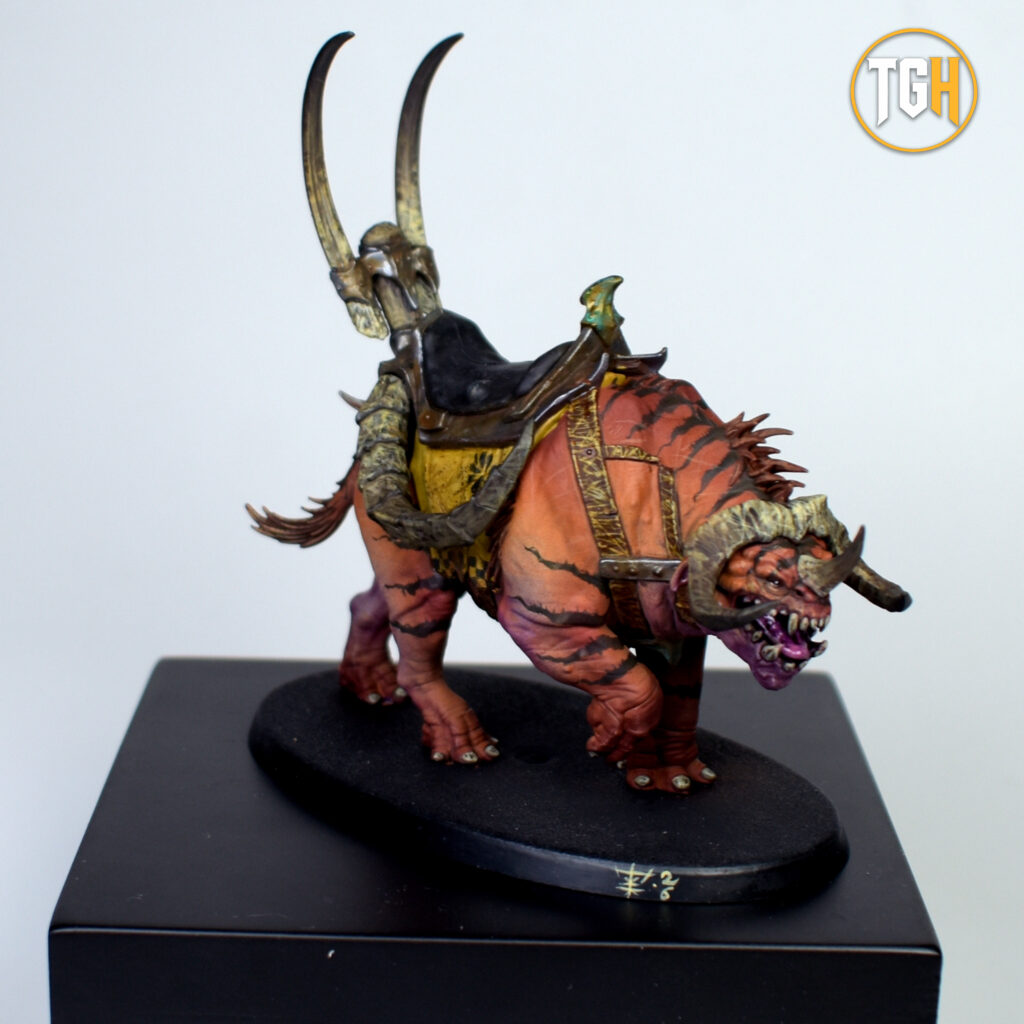
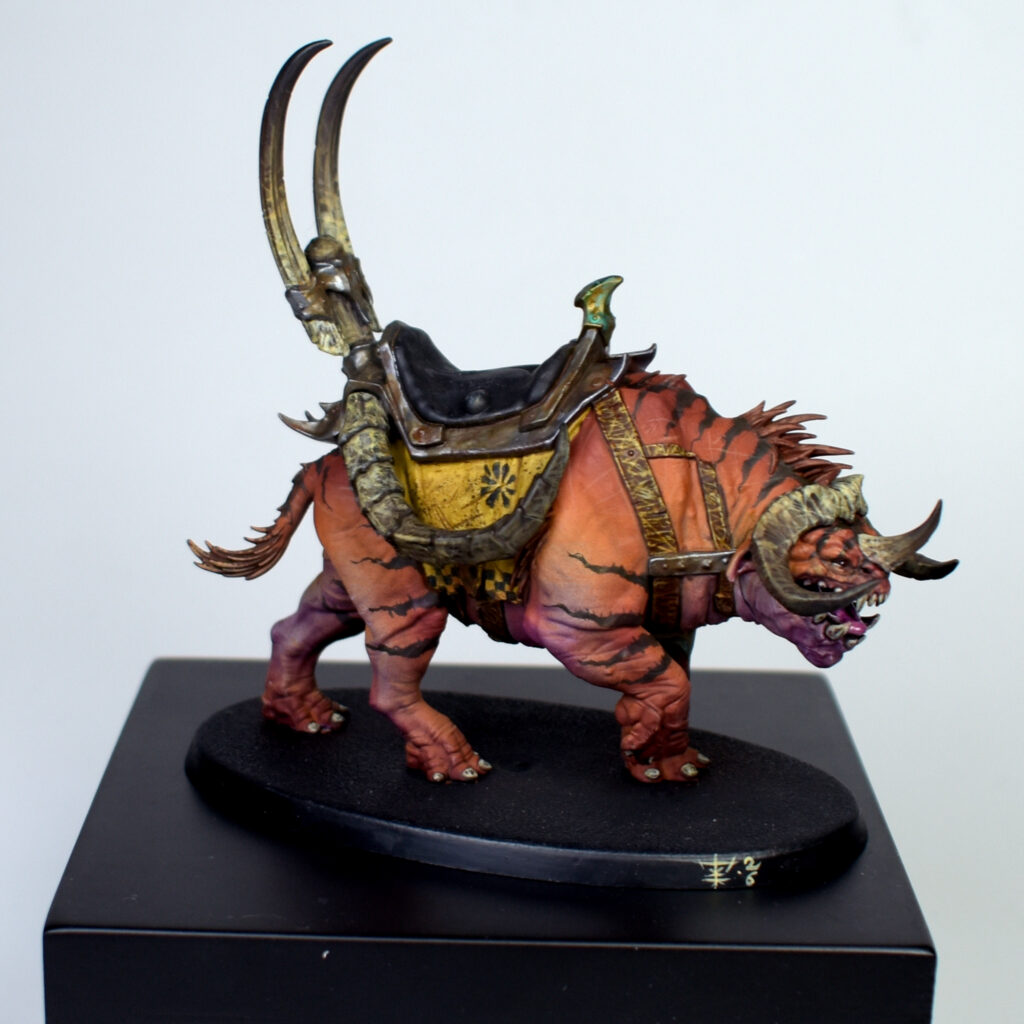
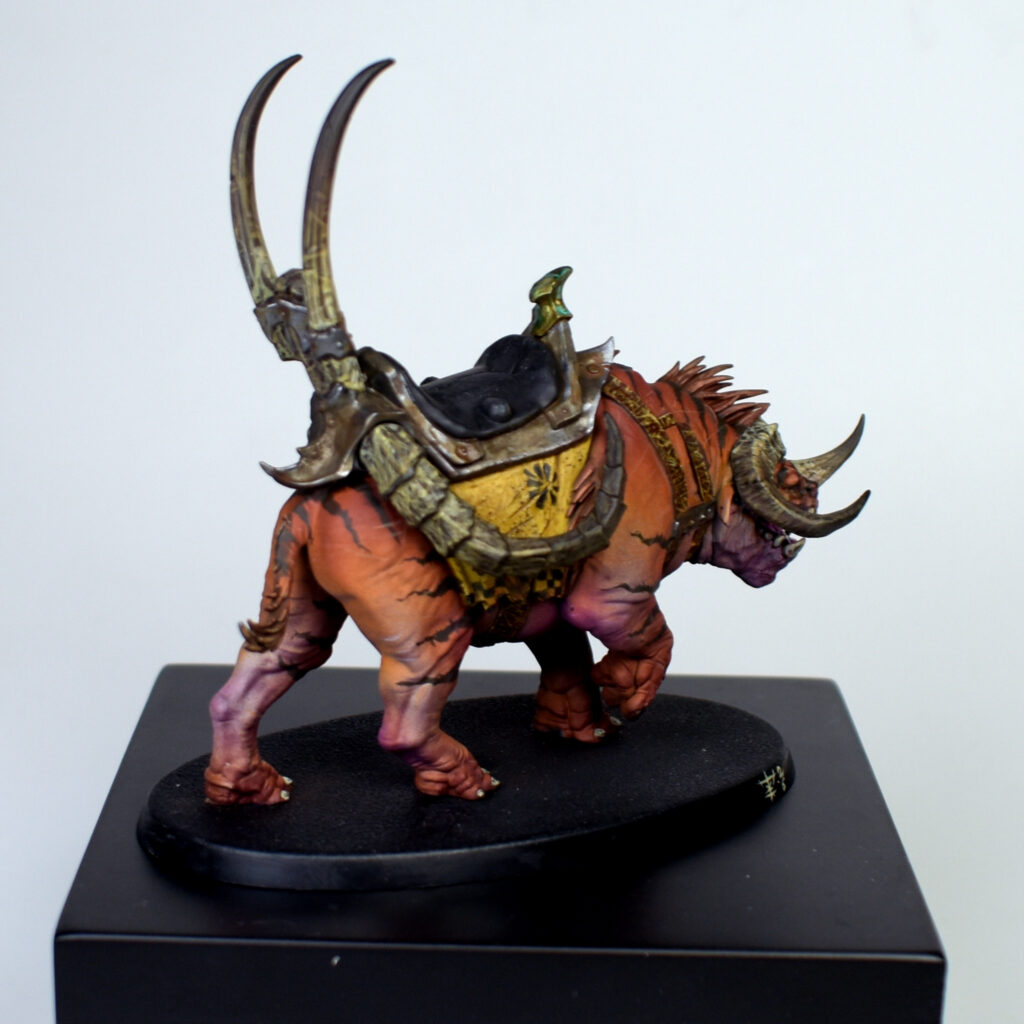
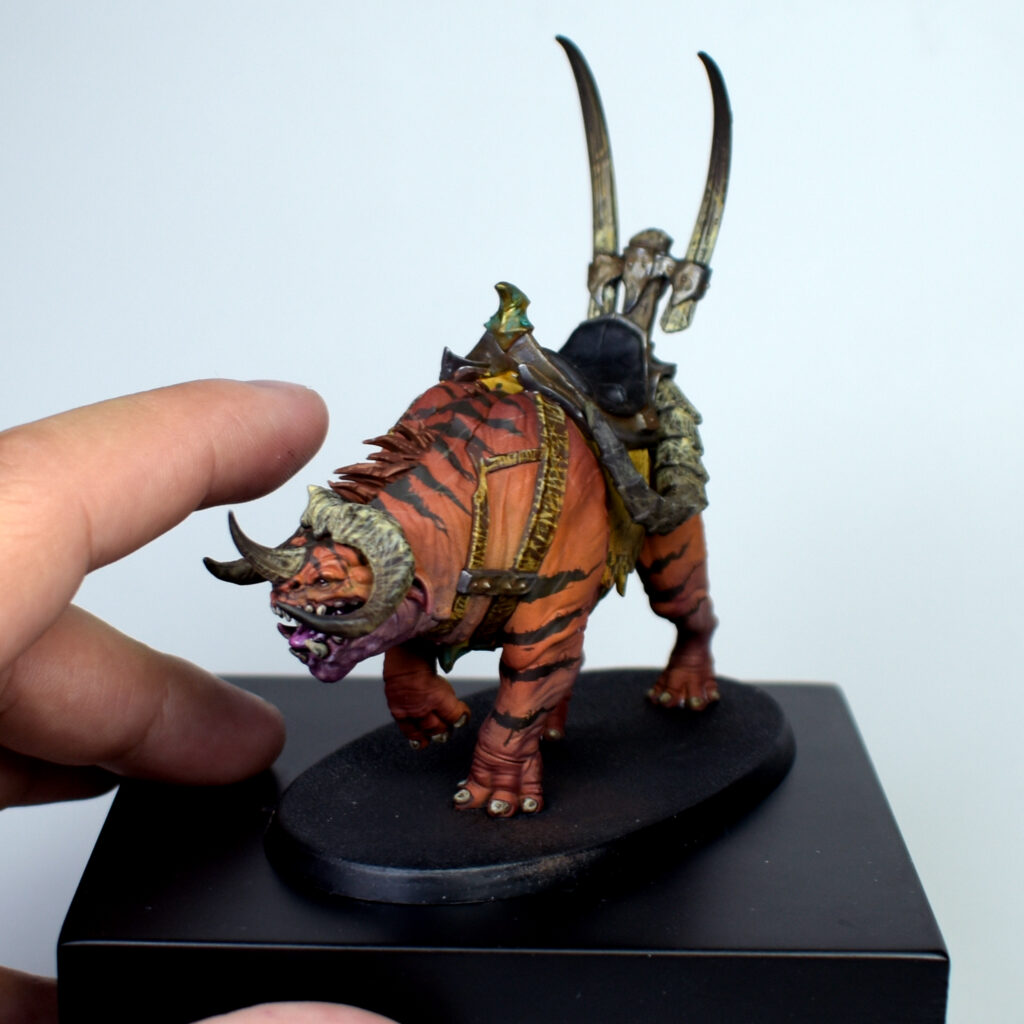
¿Queréis aprender más sobre Age of Sigmar? ¿Hay algún tema que os gustaría que tratáramos en futuros artículos o vídeos?
¡Contádnoslo en los comentarios! También podéis hacernos llegar vuestras sugerencias a través de nuestro Instagram.
Vuestra opinión nos ayuda a seguir creando el contenido que realmente queréis ver.

Descubre más desde The Generals Hub
Suscríbete y recibe las últimas entradas en tu correo electrónico.

The Generals Hub
Aquí encontrarás las últimas noticias de Age of Sigmar, mucho hobby, análisis del metajuego, estrategia y contenido para disfrutar al máximo del universo de los Ocho Reinos.
Leave a Reply