
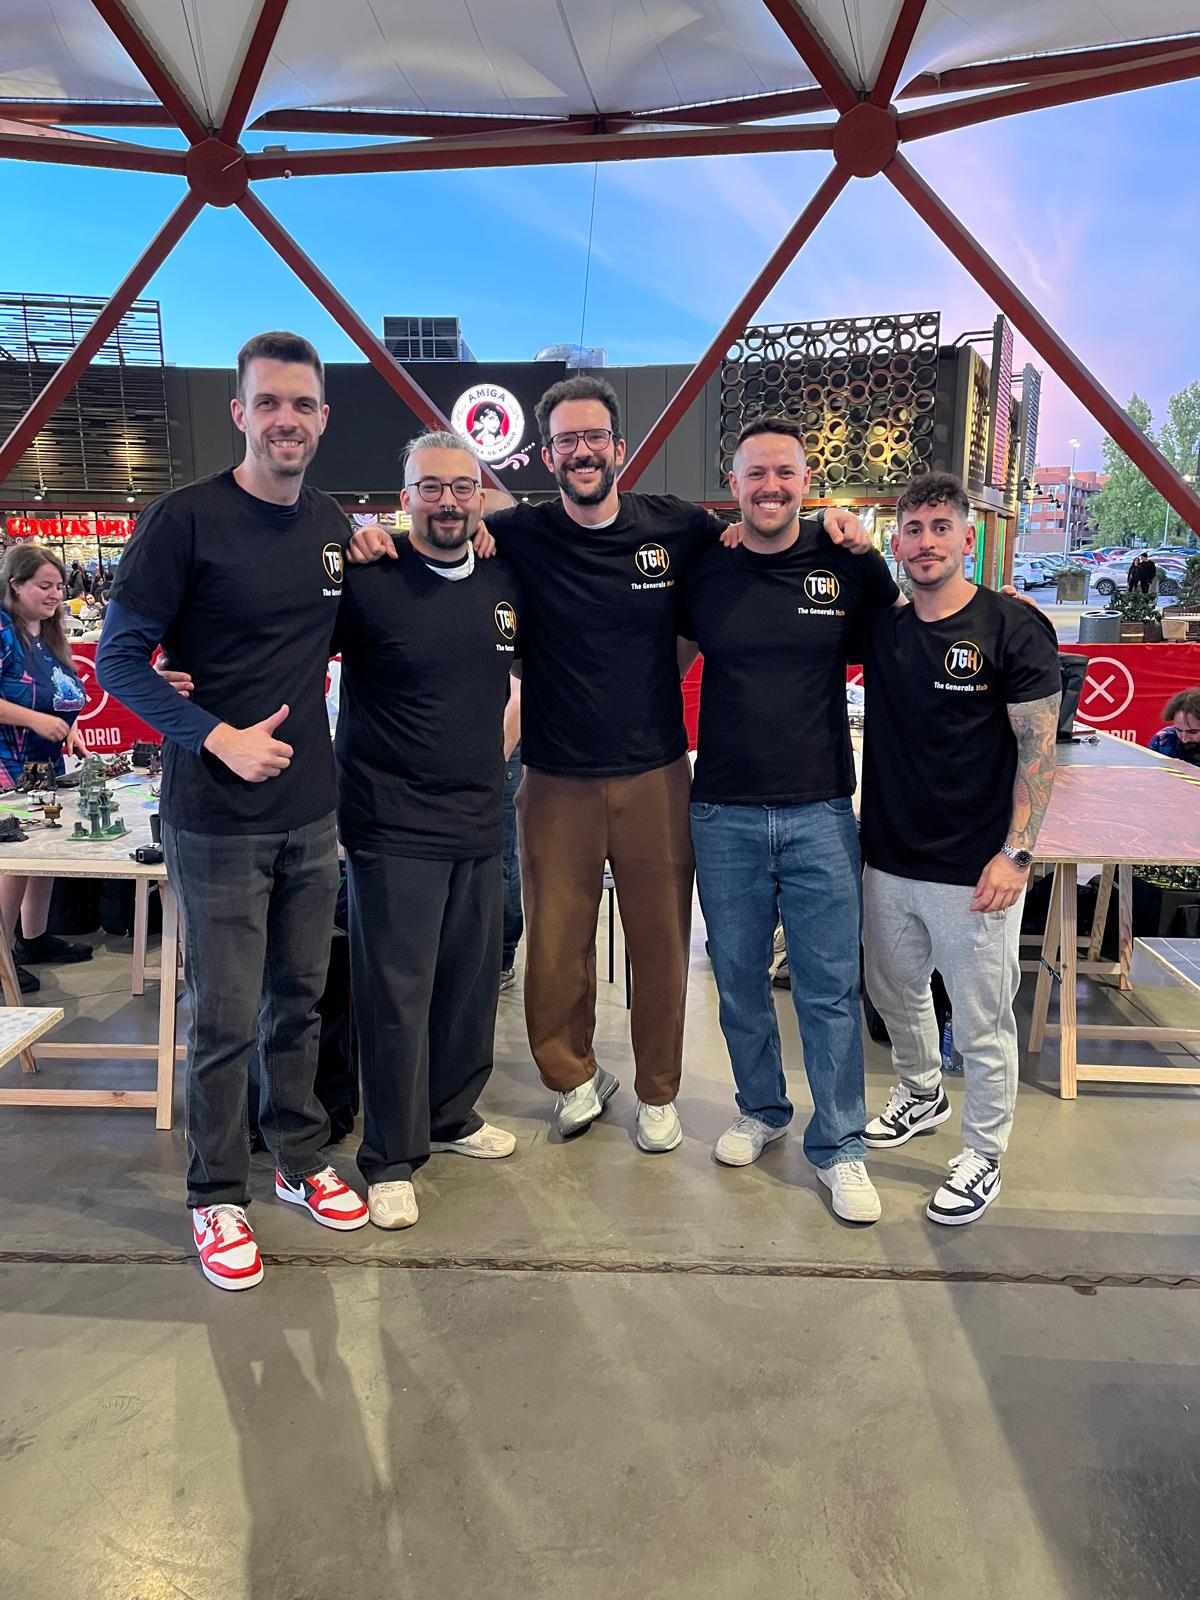
The Generals Hub Team at Letanía del Oso II

Hello, Generals!
Today, we’re the ones bringing you the battle reports. This time, we’re going to share our experience at the second edition of Letanía del Oso, held at X-Madrid.
A GT surrounded by quite a bit of controversy, where it seems that the hobby was the last thing on anyone’s mind.
Although the members of The Generals Hub were spread across three teams, none of them managed to break into the Top 5.
Here are our results:
- Guardia Team: Top 7, 160 points away from the Top 5.
- Raiderz Madriz: Top 11.
- Raiderz TGH: Top 18.
Beyond the results, we have plenty of games, anecdotes, and experiences to share with you.
We hope you enjoy this long post and our battle reports!
Let’s get started!
Our Lists
Adrián Rodriguez
Hedonites of Slaanesh
Depraved Carnival
A Sigvald 1960/2000 pts

Hedonites of Slaanesh
Depraved Carnival (10 Points)
General's Handbook 2026-27
Drops: 3
Spell Lore - Lore of Extravagance
Manifestation Lore - Manifestations of Depravity

Battle Tactic Cards: Siege of Ashes, Burning for Vengeance

General's Regiment
Sigvald, Prince of Slaanesh (240)
• General
Lord of Hysteria (140)
Myrmidesh Painbringers (260)
• Reinforced
Myrmidesh Painbringers (260)
• Reinforced
Symbaresh Twinsouls (250)
• Reinforced
• Obsession with Pain - (10) Points

Regiment 1
Shardspeaker of Slaanesh (120)
Slaangor Fiendbloods (140)

Regiment 2
Thricefold Discord (190)
• Bashful Visage
• Centre of Attention
Seeker Chariot (80)
Seekers (130)
The Masque (140)

Faction Terrain
Fane of Slaanesh

Created with Warhammer Age of Sigmar: The App
App: 1.38.1 | Data: 483
Adri Manzano
Ironjawz
Ironjawz brawl
Kill them all! 2000/2000 pts
-----
Orruk Warclans | Ironjawz | Ironjawz Brawl
General's Handbook 2026-27
Drops: 4
Spell Lore - Lore of the Weird
Prayer Lore - Warbeats
Manifestation Lore - Manifestations of Gorkamorka
Battle Tactics Cards: Blazing Onslaught and Flanking Firestorm
-----
General's Regiment
Kragnos, the End of Empires (580)
• General
Brute Ragerz (200)
• Reinforced
Scourge of Aqshy: Brutes (340)
• Reinforced
• 2 Gore-choppa
Weirdbrute Wrekkaz (180)
• Reinforced
Zoggrok Anvilsmasha (160)
• 1 Grunta-tongs
---
Regiment 1
Megaboss on Maw-Krusha (320)
• Fast 'Un
• Amberbone Whetstone
• Hulking Brute
---
Regiment 2
Warchanter (110)
---
Regiment 3
Weirdnob Shaman (110)
-----
Faction Terrain
Bossrokk Tower
-----
Created with Warhammer Age of Sigmar: The App
App: v1.38.0 (1) | Data: v483
Juanma Izquierdo
Ogor Mawtribes
Maw-Cult Fanatics
Los amigos de Maricarmen 1990/2000 pts
Ogor Mawtribes
Maw-Cult Fanatics (10 Points)
General’s Handbook 2026-27
Drops: 2
Spell Lore – Lore of Gut Magic
Prayer Lore – Lore of the Everwinter
Manifestation Lore – Aetherwrought Machineries
Battle Tactic Cards: Blazing Onslaught, Siege of Ashes
General’s Regiment
Redd the Maw, High Slaughtermaster (420)
• General
Gluttons (420)
• Reinforced
Gluttons (420)
• Reinforced
Maulbeast Raiders (210)
Regiment 1
Bloodpelt Hunter (130)
• A Choice Cut
• Dreaded far and wide
Hunters with Sabrefangs (170)
Maulbeast Raiders (210)
Faction Terrain
Mawpit
Created with Warhammer Age of Sigmar: The App
App: 1.38.1 | Data: 483
Ekkius
Ogor Mawtribes
Maw-Cult Fanatics
Menú Durum Nº3.
Durum Doble Carne
Doble ración de carne de Vanguard Pallador o Bull Centaur, verduras Sylvaneth: lechuga, tomate, cebolla y salsa especial de Redd.
Patas élficas Fritas
Porción de patas élficas fritas.
Bebida
Refresco de 330 ml a elegir.
+ + + + + +
Grand Alliance: Destruction
Faction: Ogor Mawtribes
Battle Formation: Maw-Cult Fanatics (10 pts)
Battle Tactics Cards: Blazing Onslaught and Siege of Ashes
Drops: 2
Spell Lore: Lore of Gut Magic
Prayer Lore: Lore of the Everwinter
Manifestation Lore: Aetherwrought Machineries
Faction Terrain: Mawpit
—–
Regiment 1
General’s regiment
1 x Redd the Maw, High Slaughtermaster (420 points)
1 x Tyrant (150 points)
[Artefact]: A Choice Cut
[Heroic Trait]: Leave Not a Morsel
10 x Gluttons (420 points)
10 x Gluttons (420 points)
2 x Maulbeast Raiders (210 points)
—-
Regiment 2
1 x Bloodpelt Hunter (130 points)
5 x Hunters with Sabrefangs (170 points)
2 x Frost Sabres (70 points)
—-
2000/2000 Pts
Carlos PJ
Maggotkin of Nurgle
Tallyband of Nurgle
Roti & company 1990/2000 pts
-----
Grand Alliance Chaos | Maggotkin of Nurgle | Tallyband of Nurgle
General's Handbook 2026-27
Drops: 2
Spell Lore - Lore of Malignance
Prayer Lore - Benedictions of Sickness
Manifestation Lore - Krondspine Incarnate
Battle Tactics Cards: Blazing Onslaught and Siege of Ashes
-----
General's Regiment
Rotigus (420)
• General
Nurglings (100)
Plaguebearers (260)
• Reinforced
Plaguebearers (260)
• Reinforced
Poxbringer, Herald of Nurgle (90)
---
Regiment 1
Belga the Cystwitch (130)
Lord of Plagues (120)
• Gift of Febrile Frenzy
• The Carrion Dirge
Rotswords (430)
• Reinforced
• The Weeping Flux
Sloven Knights (180)
-----
Faction Terrain
Feculent Gnarlmaw
-----
Created with Warhammer Age of Sigmar: The App
App: v1.38.0 (1) | Data: v483
II GT La Letania del Oso
The event dubbed the Madrid GT has been surrounded by controversy, particularly in certain WhatsApp groups and on social media. I’m going to try to look on the bright side, so if you’re expecting to find some pointless criticism of the GT, I recommend skipping straight to the battle reports.
The GT took place at X-Madrid, the former shopping centre in Alcorcón, previously known as Opción, which is now enjoying a second lease of life thanks to its wide range of leisure and entertainment options.
One of its standout areas is the partially covered plaza, surrounded by all kinds of bars to suit every visitor’s tastes.
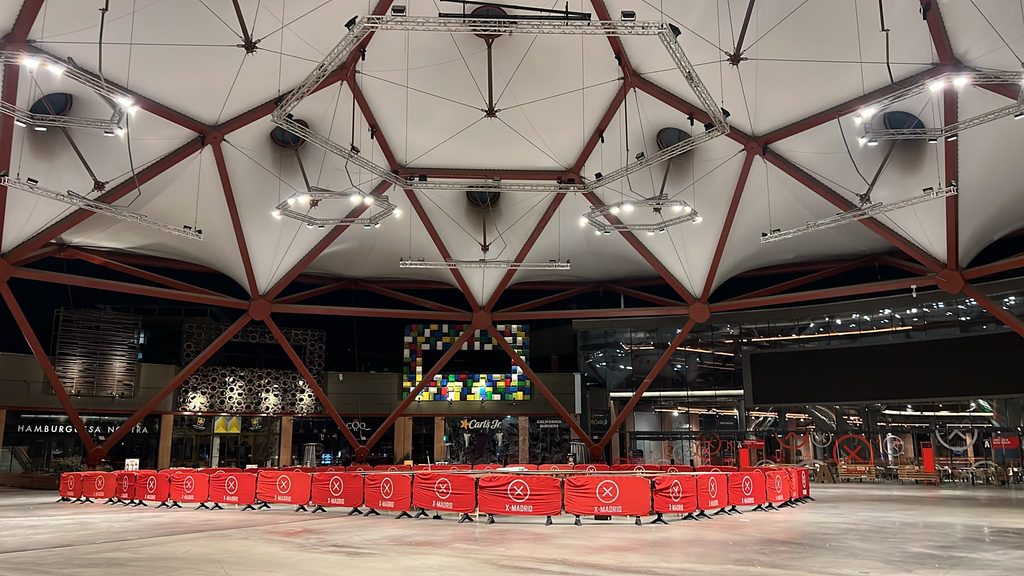
I 100% understand players who might feel uncomfortable being watched by all the people visiting the shopping centre, especially at weekends, when foot traffic increases considerably. But the reality is that these kinds of events are great for the hobby, as this visibility attracts new players and future generations.
The ease of getting any kind of drink was another big plus. Thanks, Juancho, for arranging for the waitresses to come directly to our tables with the card machine so we could pay without leaving our seats!
Also, since it was an open-air venue, we had a little more freedom from the usual unpleasant smells that tend to accompany a GT of this size. That said, the smokers became true underdogs, creating a fog worthy of the Hidden Under Ash-Clouds battleplan.
But the best part of all was seeing the vast majority of Madrid’s teams taking part, with 18 of the GT’s 20 teams coming from Madrid.
And we can’t forget the players who, despite not being able to participate in the tournament, still dropped by to say hello.
Adrián Rodriguez


I’m Adrián XL, player and captain of Raiders Madriz.
Although I spent much of the Ghyran season playing Sylvaneth, achieving some pretty good results, after so many months surrounded by pine trees, strawberry trees, and dragonflies, I decided to end the season by exploring the wonders offered by the Bloodletters of Blades of Khorne.
For this new edition, and feeling like a change of scenery, I’ve decided to leave the forests and Khorne’s daemons behind and dive into the excesses of Slaanesh.
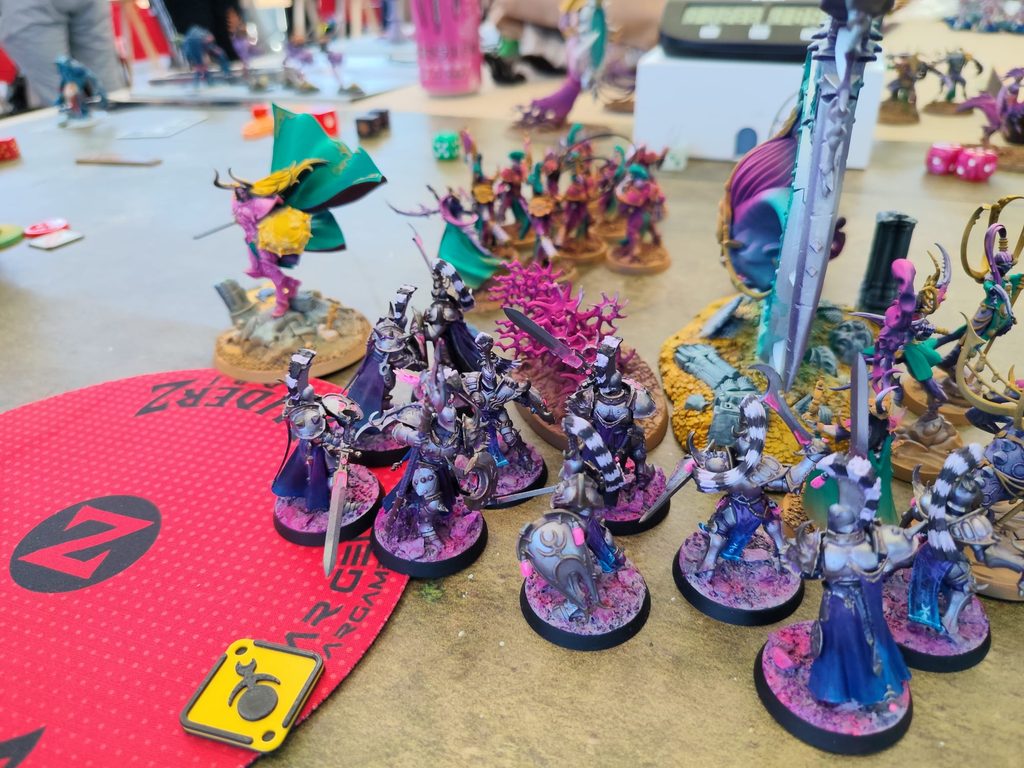
For this tournament, we decided to bring a Hedonites of Slaanesh list built around Symbaresh, mainly because of its ability to play reactively, its defensive resilience, and how reliably it can maintain a strong score into the final rounds.
It’s also a list capable of countering a significant portion of the current meta, which had a considerable impact on our opponents’ pairing matrices.
In particular, we were looking for matchups against shooting or long-range damage lists, Daughters of Khaine, and other armies capable of generating critical hits, as well as factions especially vulnerable to the debuffs that Slaanesh can apply during the different phases of the opponent’s turn.
Ronda 5 vs Oscar Gimenez
Lumineth Realm-Lords
62/62
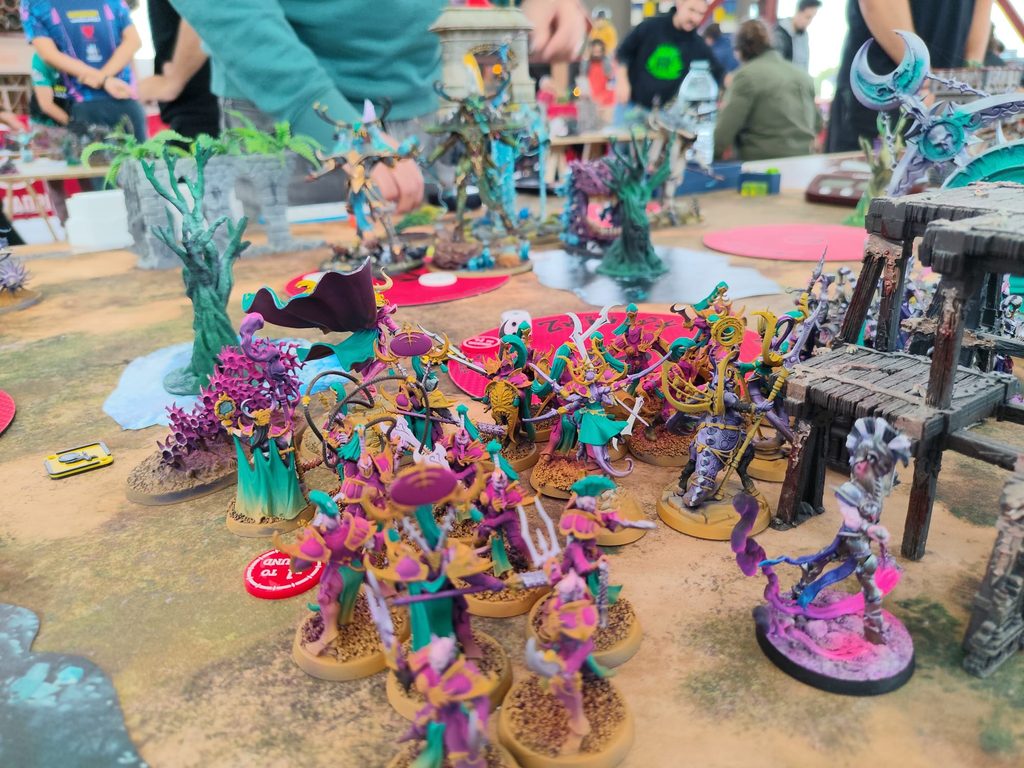
Óscar was playing a Lumineth Realm-lords list featuring Avalenor, Alarith, Eltharion, Ellania & Ellathor, and Sevireth.
Rounds 1 and 2: Controlling the Board
Óscar gave me the first turn, so I decided to score heavily right from the start, securing 20 points, while avoiding objectives he could steal from me starting in round two. On this battleplan, the underdog ability was fairly manageable.
Óscar didn’t take too many risks either and scored 15 points.
In the second round, he was still far away from my units, so I focused on completing the second Siege of Ashes tactic and setting up the board for the following turns.
Óscar didn’t try to threaten me directly either, as he could score 10 primary points without taking too many risks.
However, at the end of his turn, I was able to move several infantry units thanks to my formation ability, allowing me to prepare an offensive for the next round.
Round 3: Sigvald Enters the Fray
I won priority and decided to go straight for him.
A successful charge with Sigvald and the Myrmidesh Painbringers allowed me to take down Avalenor, although I had to spend several Rage Dice on Sigvald.
The trade wasn’t free: Eltharion managed to kill half of my Myrmidesh.
On his turn, Óscar counterattacked by charging Sigvald with Eltharion, Jaws, and an Alarith. However, thanks to positioning Sigvald in cover, his 4+ ward, and all the Rage Points I’d accumulated during the previous turns, I managed to keep him alive.
Sevireth also failed to destroy my chariot, leaving him locked in combat.
Round 4: Maintaining the Lead
I won priority again and took the opportunity to go on the offensive.
I managed to eliminate Sevireth, steal an objective, and heal Sigvald, while the Myrmidesh held their position in the centre.
On his turn, Óscar tried to reclaim my central objective, but I managed to neutralise Eltharion’s threat by throwing the mirror at him while he was engaged in combat.
That said, one of his cows eventually managed to finish off Sigvald.
Even so, Óscar couldn’t take the objective from me, as I managed to bring in more models thanks to Depraved Carnival.
Round 5: A Nail-Biting Draw
On my final turn, I managed to score 10 points, stealing one of his central objectives with the Twinsouls.
This gave me a 20-point lead on the scoreboard.
However, Óscar played a spectacular final turn: he managed to complete two battle tactics, reclaim the objective I’d stolen, and score 20 points.
Final Result: 62–62.
An incredibly close game that ended in a draw after five rounds!
Adri Manzano
I don’t really need much of an introduction, since for some reason I seem to write quite a lot around here… But I can tell you how I ended up with this list and why I decided to bring it to the tournament.
This GT had one important peculiarity: the battle tactic restriction. We couldn’t repeat the same tactics more than three times across the team, which forced us to make quite a few adjustments to our roster.
For a while, we had some trouble adapting our tactics, and on top of that, we still didn’t have a properly balanced roster.
I spent several games testing Ogor Mawtribes, but I never felt completely comfortable playing them.
On the other hand, I’d been practising with Ironjawz for quite some time, using very similar lists, although without Kragnos.
It was during Freak Wars that this list appeared, and I decided to adapt it to my playstyle and, above all, to my own understanding of how I want to play Ironjawz.
The list allowed us to free up another slot for the Siege of Ashes tactic within the team, and it also performed particularly well against monster-heavy lists.
After several games with very satisfying results, especially thanks to its ability to complete battle tactics, I became convinced that it was one of the best options for the GT.
What’s more, after the Battlescroll, the list remained practically unchanged, so I didn’t need to make any adjustments.
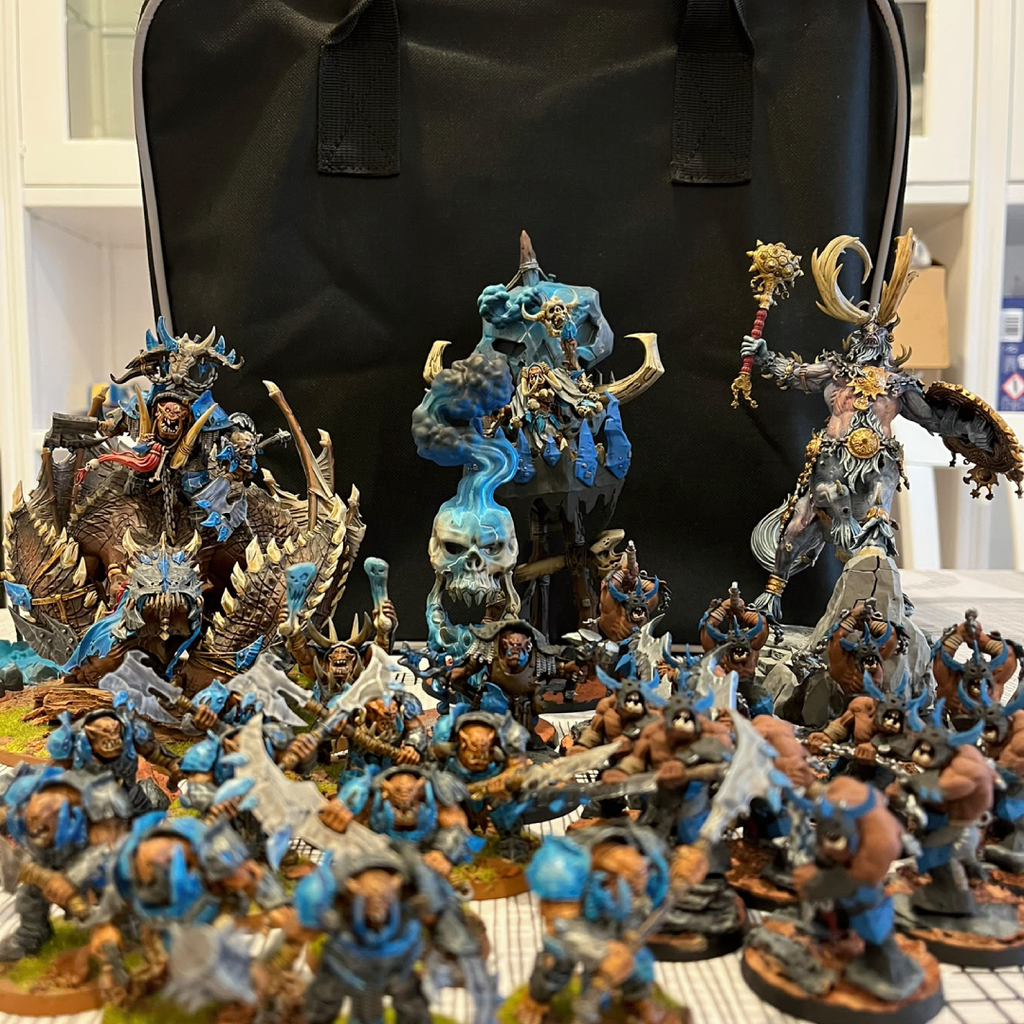
My Opponents
Here are some photos from the event and the games where I actually remembered to take out my phone.
I want to give a huge shout-out to Emilio Martín, Alberto Cereceda, Javier Laredo, and Jordi Carbonell.
Great, fair games, incredibly friendly opponents, and an amazing atmosphere!
And in the case of Alberto and Javier, playing against friends always makes the game even more enjoyable.


Ronda 5 vs Jordi “Zetiuso” de BCN Reaputin
Daughters of Khaine Coven of blood
70/75
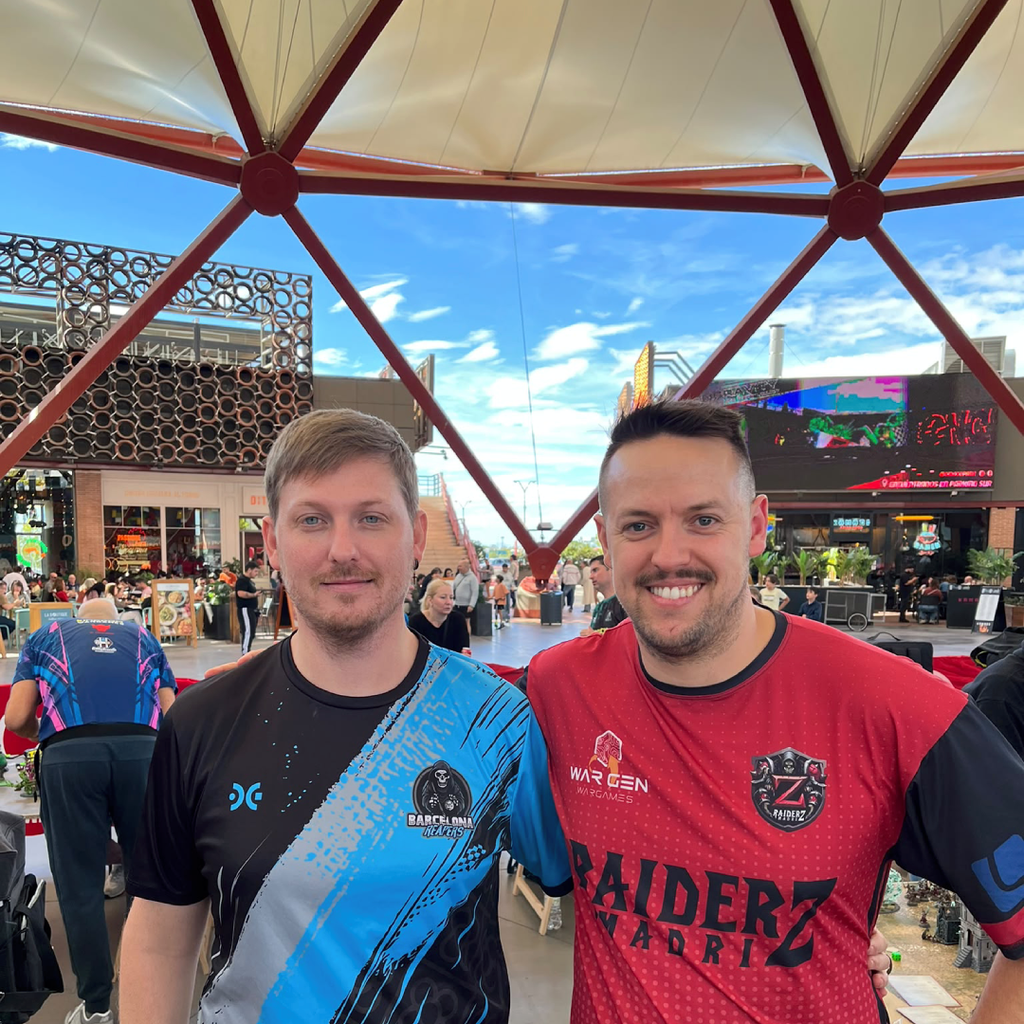
We played the fifth round against BCN Reaputin, and in my case, I was paired against Jordi “Zetiuso” Carbonell and his Daughters of Khaine.
As he told me, they were his first army and therefore his main. Interestingly, Ironjawz were also my first army in Age of Sigmar, so we were both playing the factions we’d been using since we were “little kids”.
It was a very enjoyable game, but incredibly difficult to manage. Daughters of Khaine are one of the strongest armies in the current meta, and they shine even more in team tournaments.
Nobody on our roster felt particularly comfortable facing DoK, and I ended up playing against them twice during the GT, both times because I was left as the final option in the pairings.
Round 1: A Race for Points Right from the Start
Jordi decided to go first and played a very solid opening turn: he screened the centre of the board with Endless Spells, protected both Morathis, and deployed his Khinerai to start scoring points.
On one flank, he used his Ironscale and a unit of Khinerai to complete Blazing Onslaught, while on the other, he advanced another unit of Khinerai to start Burning.
Score: 20-0 to Jordi.
It was my turn to respond, and I knew I had to keep up with him in the scoring race.
My Maw-krusha went after his Ironscale to start Blazing, while also controlling one of the terrain features needed for Flanking.
Meanwhile, the Wrekkaz, with Crit (2 Hits), charged towards Jordi’s deployment zone, targeting his Witch Aelves and, above all, looking to control an objective in his territory to complete the first Flanking tactic.
The Ragerz cleared out some Endless Spells, and the Wrekkaz used Power Through to prepare for a possible second DoK turn, aiming to tie up the Medusas and minimise the damage.
Round 2: The Orruks Go on the Offensive
After a priority roll-off, I managed to win priority.
It was time to attack.
I threw every Orruk I could at Jordi’s DoK, finishing off the Witch Aelves and completely wiping out the Medusas and a Slaughter Queen who happened to be passing by.
Score: 30-20 to me.
However, I still had a huge problem on the board: both Morathis were still alive, along with their supporting units.
Jordi spent his second turn taking down the Fugitive. Not even all the Rage Dice in the world could save the Maw-krusha from Morathi’s fury.
Score: 30-35 to Jordi.
Round 3: The Morathi Problem
I won priority again.
Jordi, who has been playing DoK since he was “little”, had positioned practically all his units near objectives or Places of Power.
I had two options:
- Fall back, buy myself another turn against DoK, and score another 10 points plus the battle tactic.
- Go after Morathi, attempting an extremely long charge that, with a bit of luck, would also allow me to reach little Morathi and avoid future problems.
I decided to attack.
The charges were long, but not long enough to reach little Morathi. Even so, I managed to kill big Morathi.
Score: 45-35 to me.
And that’s when the DoK magic started working.
Little Morathi teleported into my deployment zone, and Jordi managed to bring big Morathi back.
To absolutely nobody’s surprise, Morathi attacked in the hero phase. Does any DoK player ever fail that spell?
The result was an absolute massacre: she completely obliterated the three heroes defending my home objective and scored another 20 points.
Score: 45-55 to Jordi.
Round 4: Everything Came Down to One Charge
Luck was on my side again, and I won priority once more.
I had around 6-7 Brutes left alive, fairly close to both Morathis. This was my chance to hunt them down with Kragnos and the Brutes.
The problem was that, without any buffs available, the Brutes needed a 9+ charge to reach them.
Kragnos charged first, activating his aura so the Brutes could charge on 3D6.
They made it into Morathi!
After resolving hits, wounds, and saves, the Brutes managed to inflict 15 wounds.
But Jordi managed to keep Morathi alive thanks to her 4+ ward.
And that was pretty much the game.
With Morathi surviving, she denied me the final Blazing tactic, and I could no longer keep up with his scoring.
I managed to score another 10 primary points, and then it was time to run.
Score: 55-65 to Jordi.
On his turn, Jordi teleported Morathi to steal another objective from me and secure another 15 points.
Score: 55-75 to Jordi.
An 11-inch countercharge from Kragnos wasn’t enough to change anything, despite a massive screw-up on my part.
We did the maths and realised there was no way to squeeze out any more points. I managed to complete the second Flanking tactic, and we called the game.
Final Result: 70-75 to Jordi
An incredibly close game, decided by small details and DoK’s enormous ability to stay in the game even after losing a significant portion of their units.
What Could I Have Done Better?
I think my biggest mistake was not using the Maw-krusha more aggressively from the start.
I had the opportunity to eliminate a unit of Khinerai that ended up stealing objectives from me throughout the game.
I decided to play a little more conservatively with him, trying to keep him alive for the following turns.
However, Morathi eventually hunted him down fairly easily, so that caution didn’t really pay off.
Eliminating those Khinerai early on would probably have changed the course of the game quite significantly.
In any case, it was a very close game against a great opponent.
Juanma Izquierdo
Hello everyone!
I’m Juanma Izquierdo, and this is my first article for The Generals Hub.
For those who don’t know me, I’m a player from Madrid, a member of Wargame Garrison, and lately I’ve been playing Stormcast Eternals, although I don’t think I’ll ever enjoy the game as much as I did playing Khorne in second edition.
For this II Letanía del Oso, I’ve decided to give Destruction a second chance. Spoiler alert: my first attempt went worse than renewing Vinicius’ contract.
On the very same day I picked up my giants, Games Workshop nerfed Bounty Hunters. I enjoyed painting them, and they’re still the models that attract the most attention in my display cabinets, but I don’t exactly have fond memories of Talavera that year. I missed more chances than, once again, Vinicius, only this time even after his surgery.
Now I’m playing Ogor Mawtribes, and although I’ve probably just come back from the most frustrating tournament I can remember in terms of dice rolls, painting this army has been worth it.
I’ve really enjoyed painting the list, and I sincerely hope that future points updates bring down the cost of the rest of the army so we can play more options.
Here’s my list:
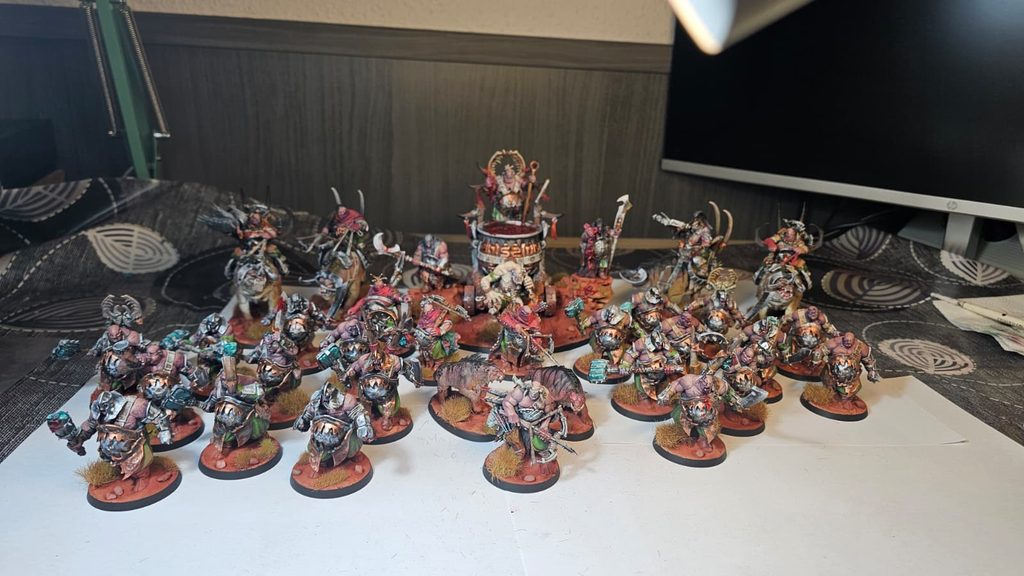
The goal of my list was to complement a main block consisting of Redd and two units of Gluttons (I’m a true innovator, I know) with something that would allow me to score reasonably efficiently, without relying too heavily on the pairing or the battleplan.
I went with a unit of Hunters on foot (whenever I’ve played two units, they’ve ended up getting in each other’s way), the Bloodpelt, and two units of Hunters on horseback.
With the latter, I’ve learned the hard way that they neither hit hard nor survive much. Although, to be fair, I probably shouldn’t treat this weekend as the holy grail of statistics and probability when it comes to dice rolls.
Either that, or I’m worse than an Eneryeti rum and coke…
Now, let’s get into a little battle report from the tournament.
This time, I’ll tell you about my game against Javier, from Dragones de Piedrabruja A.
I’m also including a couple of photos with players from other rounds, such as Sergio, from Nagash, and Miguel Selles, from BCN Reaputin, who showed no mercy to my poor Redd either…


Ronda 4 vs Javier Murillo
Disciples of Tzeentch
71/57
We went into the fourth round hoping to turn around the disastrous Saturday we’d all had.
Playing against Tzeentch is never easy, especially on a six-objective battleplan like Treacherous Ground. Although the fact that the underdog could remove one objective made me think I might have some control over the game.
I decided to deploy Redd and the big lads on one flank, with a unit of cavalry on the other.
He was going first, so if he failed his movement spell, I could potentially get through turn 1 without losing any units, with a chance of getting a double turn to establish a good position on the board and push forward.
To absolutely nobody’s surprise, the spell went off.
The little horses could do nothing but die on turn 1, along with half a unit of Hunters who had moved to the other side, apparently bringing along some Flamers with rather impressive aim.
His turn ended with 20 points and my hopes of salvaging the weekend going down the drain.
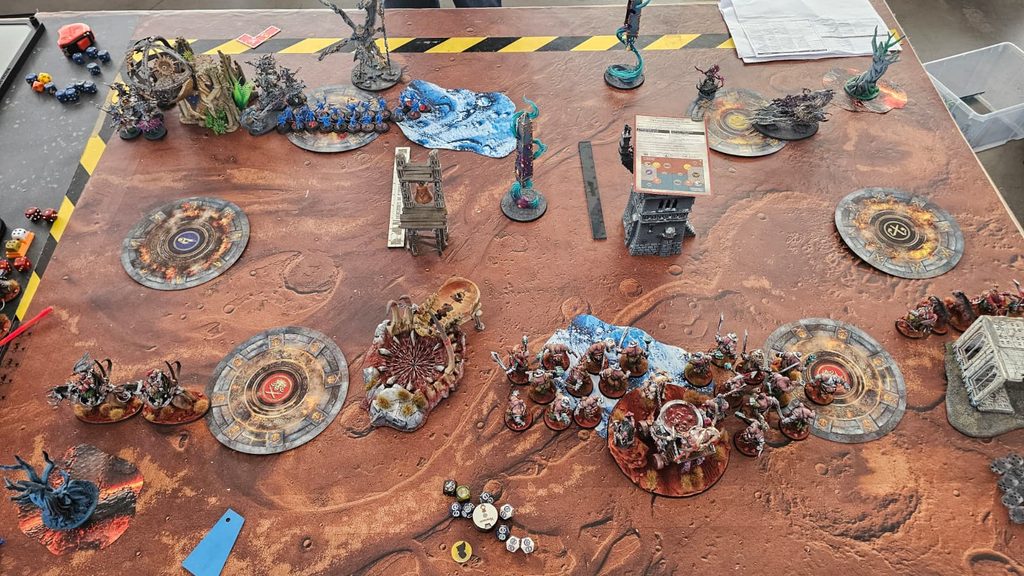
My Turn 1: All or Nothing
So, what did I do?
I had the big chicken fairly close, right next to some Blues. It was all or nothing. It was like putting your faith in Ferran Torres at a World Cup, but I had hope (or desperation, which often go hand in hand).
Have you ever thrown a crumpled-up piece of paper into a bin and told yourself that if it went in, you’d pass an exam?
Well, my crumpled-up paper was Redd’s spell to move the Gluttons 6 inches.
A miracle!
I spent a command point to let them run and charge. He failed a permanent spell that was blocking pretty much everything.
This was my moment.
The Gluttons ran 6 inches and ended up right on the doorstep of glory. I dropped the Hunter in behind with the other cavalry, hoping they’d even leave the big chicken nicely tenderised.
Redeploy from one of his Blues.
Bloody hell, everything was going fucking brilliantly.
The shooting phase came and went without much happening, but I needed an 8-inch charge to get into combat with the Temu version of Kairos.
The charge phase arrived. I rolled the dice.
A six.
“Juanma, don’t reroll that charge. God knows you’ll end up rolling a three…”
I took my own advice.
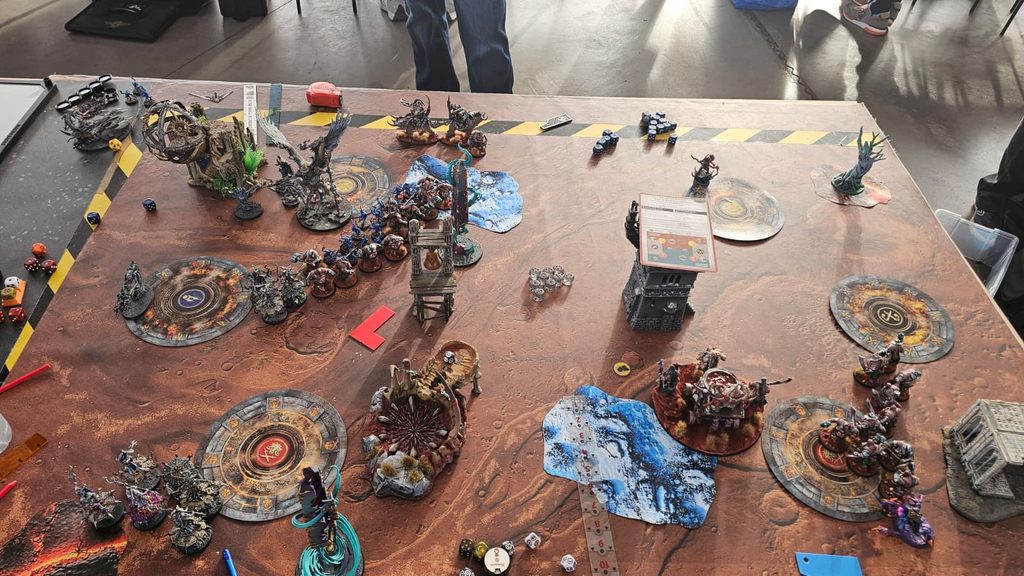
With Bull Charge, I managed to get a little closer to the beast, but ended up forming a shitty conga line that became even shittier after my pile-in move.
Of course, neither the Hunter nor the cavalry managed to make their 9-inch charges.
I split my attacks between the Blues, the Tzaangors on Discs, and the big chicken, which only three brave Gluttons could reach.
The beast dies! Joy!
But of course, between the Fate Points and a Rage Die, he manages to keep it alive.
The Blues die, but I barely scratch the Discs.
He hits back and kills two Gluttons, just enough to force me to remove another two due to coherency.
End of turn.
As usual with the Gluttons, I deal one mortal damage. He saves it.
And things were about to turn into the worst day of my life.
Here come the Rage Dice.
I was already imagining rolling two ones and putting the entire army up for sale on Wallapop, but instead I rolled a six and a four, with the four also managing to wound.
The big chicken finally dies!
I can breathe again.
Turn 2: The Gluttons Become Heroes
On his second turn, my opponent sent his Tzaangors on Discs after those heroic Gluttons, who managed to get completely inside a forest thanks to a Redeploy.
The Hunter was nearby, ignoring the first point of damage in each phase.
The Discs hit hard, but with a command point and a -1 to hit, those six Gluttons hidden in the shadows were going to make the fight feel longer than 90 minutes at the Bernabéu.
(You can decide for yourself whether that’s because of the legendary comebacks of the past or the boring matches these days.)
After taking the attacks, three Gluttons were still alive, and I still had another turn to play.
The Outcome: Ten Points on Repeat
From that point until the end, we both scored as best we could, with the difference being that he couldn’t compete on primary objectives, while I was scoring tens like Maradona.
As for battle tactics, we scored practically the same.
The difference is that, with two Spawn and a hero, Tzeentch can score just as many points as 1,200 points of Ogors on the board.
And that’s how a game that started disastrously ended with me managing to turn things around.
Finally, a huge thank you to all my opponents this weekend.
Especially those who apologised to me for their dice rolls. =(
Ekkius
Hello, Generals!
Today I’m bringing you a short battle report from my first round at the Letanía del Oso Madrid GT, where I faced my fellow The Generals Hub member, Carlos.
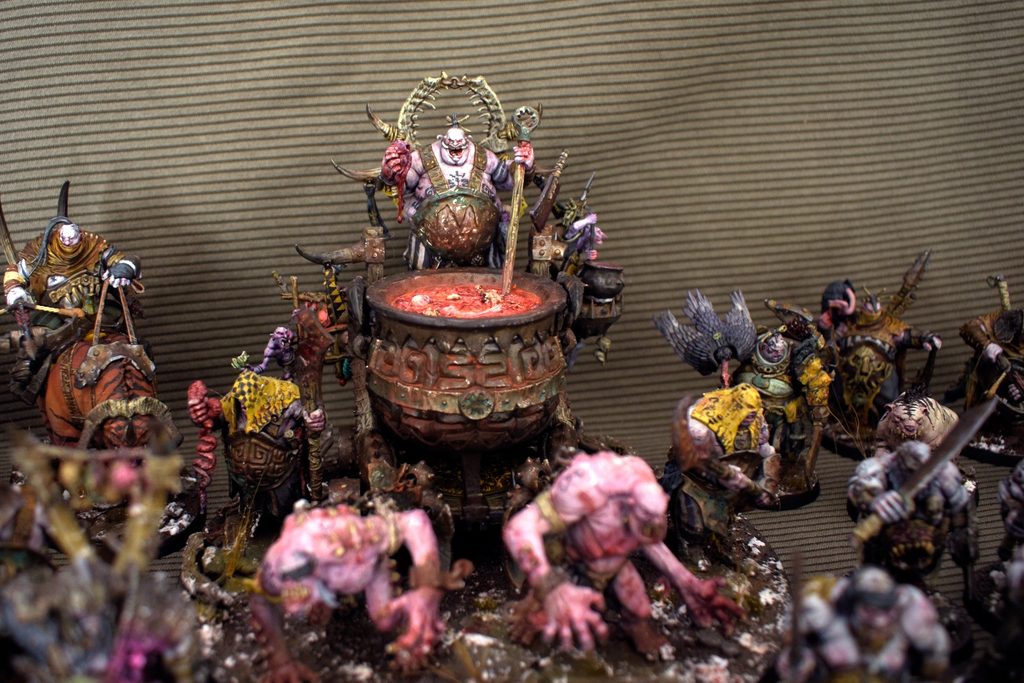
The foundation of this list is a two-drop setup with one very clear objective: give the opponent the first turn to force them to advance, close the distance, and look for that coveted double turn in round two, while keeping crucial information hidden during deployment.
The first regiment is led by the Bloodpelt Hunter, accompanied by the Hunters and Sabres. Having the Bloodpelt as the regiment leader allows another unit to be placed in Deep Strike, arriving more than 9″ away from the board edges and enemy units. This offers tremendous versatility, as we can keep the Sabres in reserve to secure a Siege of Ashes tactic in the first or second turn, or deploy them hidden within 3″ of a terrain feature, taking advantage of their rules, while sending the Bloodpelt and Hunters to pressure monsters or unsuspecting units.
The core of the army revolves around Redd the Maw, the Tyrant, two reinforced units of Gluttons, and the Maulbeast Raiders. Redd always stays close to the Gluttons to provide them with a valuable 6+ Ward. In the centre, the Tyrant protects the infantry, ignoring the first point of damage in each phase and preventing nearby enemy units from healing thanks to his trait.
Meanwhile, the Maulbeast Raiders provide excellent mobility during the opponent’s movement phase, making countercharges and objective captures easier. They also benefit from the Beastclaw trait, gaining bonuses if the Bloodpelt successfully lands his earlier shooting attack. This also helps squeeze out the damage needed to complete the first Blazing Onslaught tactic before the Gluttons completely tear through the enemy.
Ronda 1 vs Carlos PJ de Guarida Team: Sneaky Blinders
Maggotkin of Nurgle Tallyband of Nurgle
45/41
The Matchup
It was a game where I was pretty sure that we were both going to meet in the middle of the board and start smashing each other.
I also knew that my list was a fairly awkward matchup for Carlos, since, thanks to my Ogor Mawtribes subfaction, I could heal D3 wounds on each Ogor unit that had used its Eat ‘Em Alive ability at least once during the game.
This allowed me to mitigate much of the damage caused by Nurgle’s diseases at the end of each turn, which was especially important in a battle of attrition like this one.
Deployment
As for deployment, I positioned my units more than 3″ apart to prevent diseases from spreading, forming a fairly solid frontline with the Tyrant and two reinforced units of Gluttons, while Redd stayed just behind them.
At the bottom of the board, I deployed a unit of Sabres and the shooting Maulbeast.
Finally, I kept the Bloodpelt and a unit of Hunters in reserve using Deep Strike, planning to bring them onto the battlefield later, more than 9″ away from the enemy.
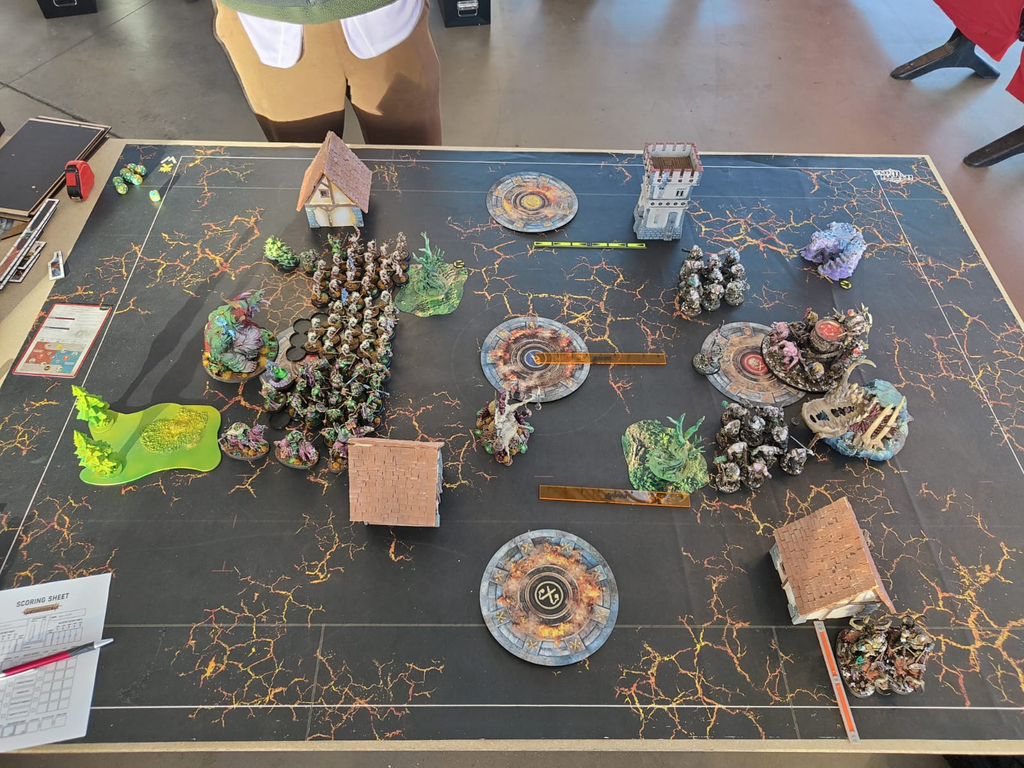
Carlos starts his turn 1 after deployment is complete.
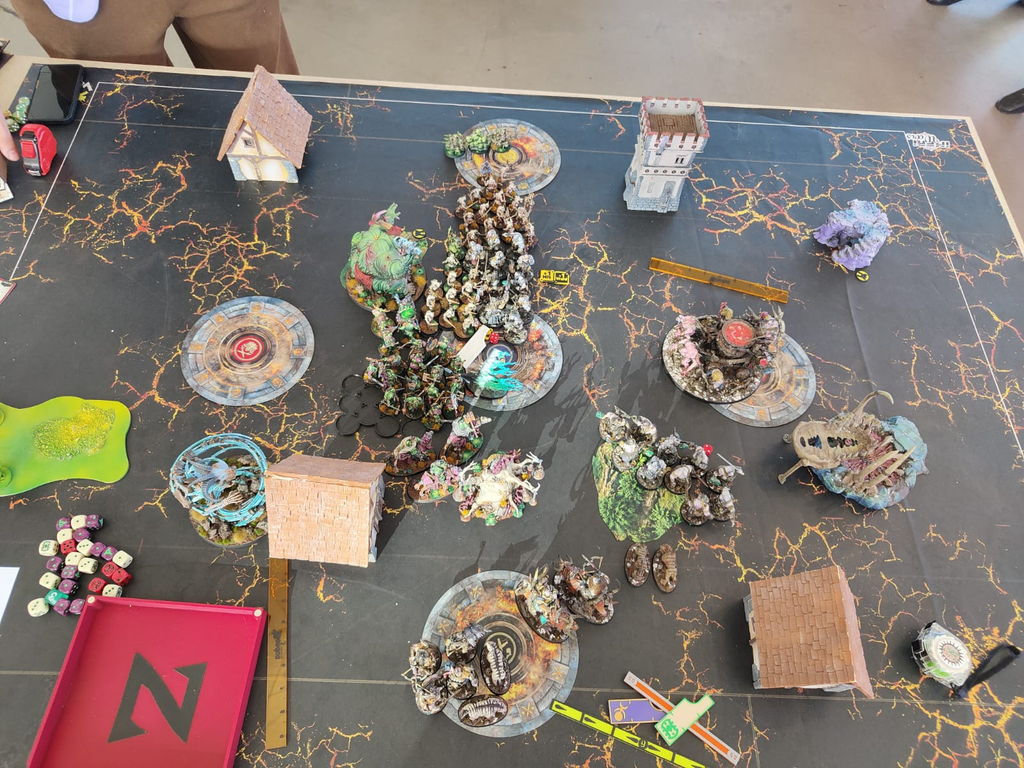
He manages to cast Krondspine and apply a -1 to wound debuff to a unit of Plaguebearers. Like any good Nurgle player, he takes control of the centre of the board and completes the first Siege of Ashes tactic in the upper section, using some Nurglings and a character.
Meanwhile, during his turn, I successfully cast the Pendulum and take advantage of the movement available during my opponent’s movement phase to push my cavalry forward.
My Turn 1
I start by having the Ogor unit in the upper section use its eating ability thanks to Redd and spending 1 command point, choosing the option to reduce the enemy’s Ward by 1.
I also manage to cast the +1 to hit spell on that same unit, just in case the Tyrant couldn’t make it into combat, although he eventually does.
With the Gluttons, I use Bull Charge against the Plaguebearers. Between the charge damage, combat, and the bites at the end of the turn, I manage to complete Blazing Onslaught 1, dealing at least 1 point of damage in three different phases.
Throughout this process, I keep both units away from the Rotswords to prevent them from getting into combat.
Thanks to the Tyrant’s title, infantry units with 1 or 2 Health cannot contest objectives while in combat with him. This allows me to take control of the central objective.
The Lower Section
At the bottom of the board, the Sabres and cavalry allow me to complete the first Siege of Ashes tactic.
I also decide to focus all the shooting power of the cavalry, Bloodpelt, and Hunters on the Rotswords, aiming to gradually weaken the unit and make the fights in the following turns easier.
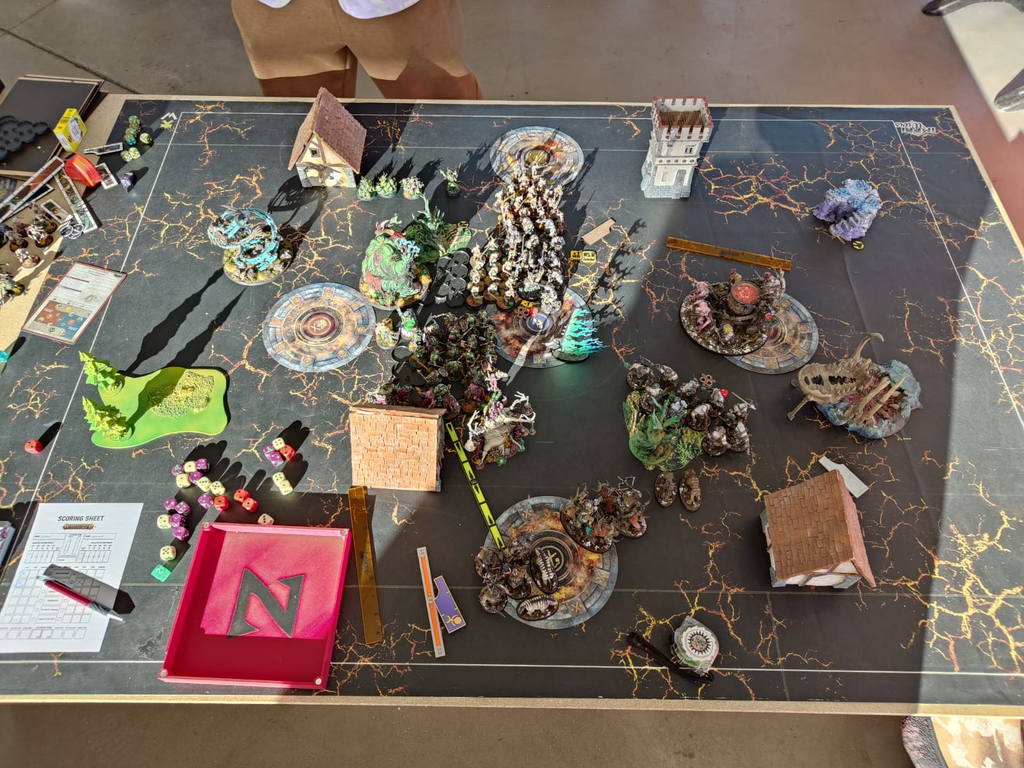
Round 2
Carlos wins priority in round 2, denying me the chance to take a double turn.
He fails to banish the Pendulum, forcing his units to move while respecting the control zone of my Endless Spell.
Once his movements are complete, the Pendulum manages to tie up the Rotswords and the Sloven, limiting the number of models that can pile in towards my Tyrant and Gluttons. This allows me to reduce the pressure on my units and better control the fights in the centre of the board.
Carlos decides to focus all his efforts on killing my Tyrant, eventually managing to take him down.
With this move, he achieves several objectives: continuing to maximise his score, removing the threat of my artefact, which allowed me to ignore one point of damage in each phase, and completing his Blazing Onslaught tactic.
My Turn 2
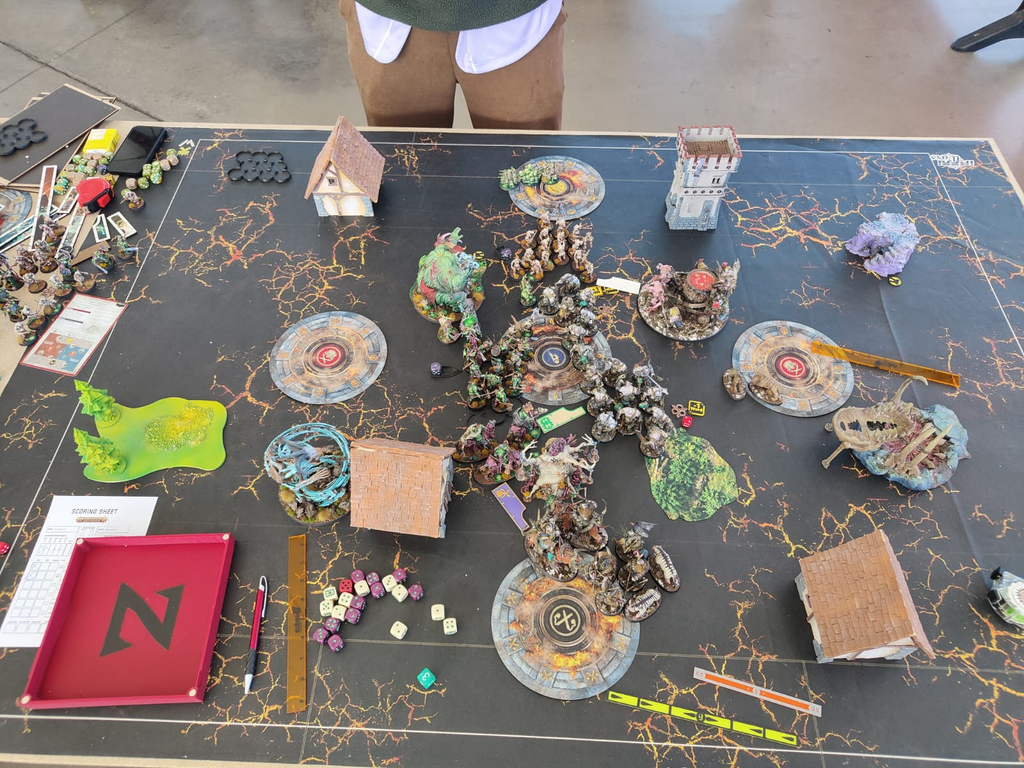
The second unit of Gluttons was eager to join the party. Thanks to Redd’s ability and spending 1 command point, they manage to eat and choose, just like the first unit, the ability to reduce the enemy’s Ward by 1.
Meanwhile, I continue focusing all my shooting attacks on the Rotswords, trying to gradually weaken that infantry block.
After the charges, I manage to tie up his cavalry with mine, while the second unit of Gluttons, accompanied by Redd, charges into his infantry.
Things didn’t go exactly as planned here. I remember that the Gluttons weren’t particularly lucky with their hit rolls, and to make matters worse, Carlos rolled some pretty good saves.
As a result, his Rotswords block barely suffered any losses, despite all the effort I’d put into weakening it.
At least I managed to score the second Siege of Ashes tactic, using the unit of Gluttons that hadn’t moved and the one that had just charged.
After using Power Through with Redd, I manage to move him closer to more infantry units so they can benefit from his 6+ Ward aura.
I also finish the round with the Ogors’ buffs modified.
Round 3 (Both Players)
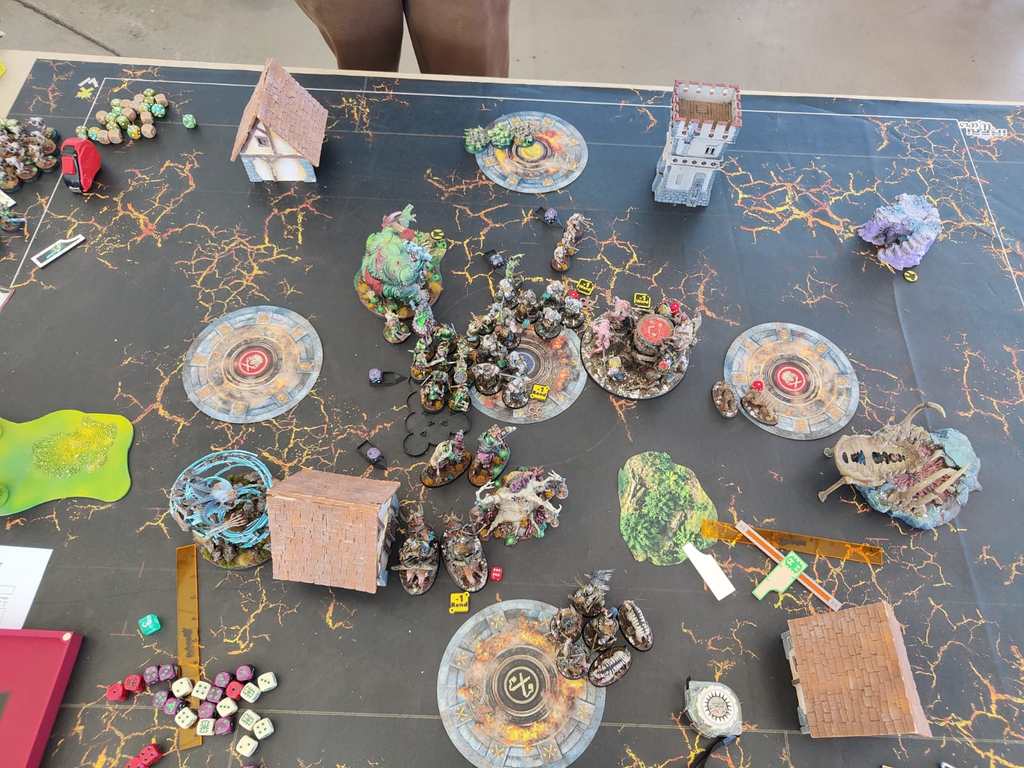
Unfortunately, I only have one photo from this round, but I’ll quickly explain how the game ended.
Priority continued as expected, with neither player getting a double turn.
In the centre of the board, we continued trading blows. During Carlos’s turn, he managed to kill a Glutton in the hero phase, which meant that Rotigus couldn’t position himself within half an inch of my units and therefore couldn’t complete his charge.
The Gluttons gradually fell, and by the end of my turn, only a lone Glutton and Redd remained, alongside four enemy Plaguebearers.
As for battle tactics, neither of us managed to reach the opponent’s Hideout, so we both failed to complete that objective.
The Lower Section
At the bottom of the board, the Krondspine finished off my cavalry, while the Hunters continued piling in and attacking the Nurgle tree, although without much success.
With all that, and after discussing how turn 4 would likely play out, we decided to call the game.
Final Result
45-41. Ogor Victory!
Conclusions
I finished the game very happy, both with the result and with the opportunity to enjoy another match against Carlos.
He’s a fantastic opponent who’s always a pleasure to play against and, on top of that, his armies are beautifully painted, making every game a real visual treat.
Always a pleasure, Carlos!
Carlos PJ
For Letanía del Oso, I brought a list designed to act as the team’s shield, withstand difficult matchups, and squeeze out as many points as possible through primary objectives.
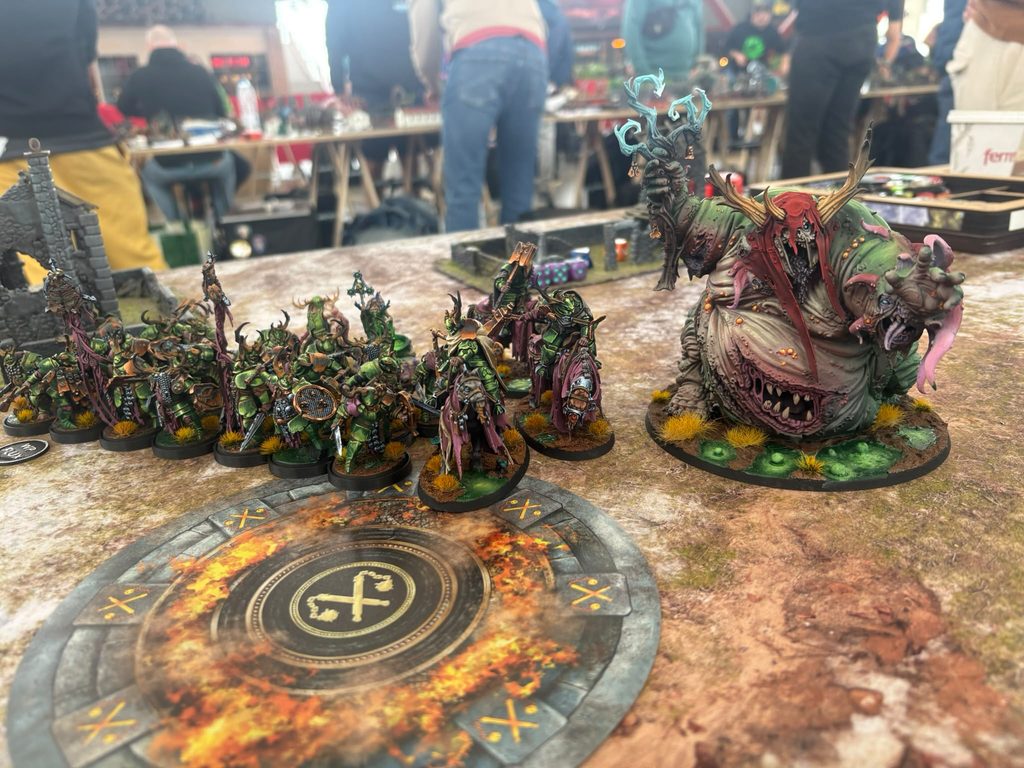
The core of the list consisted of two reinforced units of Plaguebearers and one reinforced unit of Rotswords, forming three blocks of around 40 wounds each, making them quite difficult to remove from objectives.
The plan was simple: the Plaguebearers would control the objectives on the flanks, while the Rotswords held the centre of the board. Meanwhile, Rotigus provided support and made it harder for enemy units to heal.
Ultimately, a simple but effective plan: plant my units on the objectives, hold out for as long as possible, and force my opponent to come and remove me.
Ronda 1 vs Mario Calafate de NAGASH’S FORBBIDEN CHAMBER
Gloomspite Gitz Troggherd
51/35
We reached the final round of the Letanía del Oso GT, where I faced Mario from Forbidden Chamber, a really great guy with whom I thoroughly enjoyed the game.
My opponent was playing a Gloomspite Gitz list featuring Trugg, reinforced Rockgut Troggoths, River Trolls, Boingrot Bounderz, and Loonsmasha Fanatics.
Trugg and the Rockguts were particularly worrying, as they could reach some pretty ridiculous Rend values.
The Game Plan
My list was designed to act as a shield in team pairings. Two reinforced units of Plaguebearers, one unit of Rotswords, and Rotigus formed three blocks of around 40 wounds, designed to hold objectives and score primary points, even if completing battle tactics was more difficult.
The battleplan, Curse of the Gnaw, suited me particularly well: two side objectives worth three points each that I could occupy with the Plaguebearers while pushing towards the centre with the rest of my army.
The list had two drops to try to secure the first turn and position the Plaguebearers on the objectives before taking any charges, making use of their -1 to hit.
However, my opponent also had two drops, won the tie-breaker, and decided to go first.
Time to fight an uphill battle.
Rounds 1 and 2: Keeping the Plan Alive
The Gloomspite started by putting pressure on both flanks. On the bottom right, they managed to engage my Plaguebearers outside the objective, preventing me from scoring, while their units advanced on the upper left.
My opponent finished his first turn with 10 points. On mine, I managed to occupy the upper-left objective and complete Form a Wall from Siege of Ashes, scoring five battle tactic points and three primary points.
I could have tried to score more, but I preferred to save the first Blazing Onslaught tactic to stay behind on points and take advantage of the Underdog ability in the following round, which could deal five lovely mortal wounds to two units of trolls.
We finished the first round 10-8 in favour of the Gloomspite.
In round two, the Troggoths finished off the Plaguebearers on the bottom-right flank, although they had managed to keep a significant portion of the enemy army occupied for two turns.
On my turn, I completed the first Blazing Onslaught tactic by carefully managing damage across different phases: Belga’s spell in the hero phase, attacks from Plaguebearers and Sloven Knights in combat, and diseases at the end of the turn.
Meanwhile, I took advantage of a manifestation my opponent had placed next to my Rotswords to advance towards his central objective using a Pile-in.
I managed to charge the River Trolls, eliminate them, and steal the objective.
I finished round two in the lead, 20-18.
Round 3: The Troggoths Start Smashing
I knew a serious beating was coming.
Trugg and the Rockguts charged into my Rotswords, but I managed to make a Redeploy to form a barrier that prevented them from reclaiming the central objective.
They practically wiped out the unit, but my opponent only managed to score three primary points.
On my turn, I took advantage of the gaps I’d created during combat to charge Rotigus into some River Trolls that had been brought back near his Hideout.
I sent the Nurglings, cavalry, and my smaller heroes into the Rockguts. The idea was to use them as bait to stop the trolls from finishing off the surviving Rotswords, which I needed to complete a battle tactic.
The plan worked.
On top of that, thanks to Rotigus’s Pile-in and the Lord of Plagues’ artefact, which reduced enemy control by five, I managed to steal his central objective.
A 17-point turn: seven primary points and two completed battle tactics.
Rounds 4 and 5: Holding On and Scoring
In round four, I decided to take advantage of the double turn.
With much of my army destroyed and very few opportunities left to complete more battle tactics, my priority was to secure primary points.
I managed to score another seven points.
In round five, my opponent took the double turn and tried to kill Rotigus to reclaim the centre, but failed.
He also brought back a unit using Skragrott to occupy the upper-left objective, which had been left undefended.
On my final turn, the surviving Plaguebearers returned to that objective, allowing me to control more objectives than my opponent and score another seven points.
Conclusions
Nurgle victory, 51-35!
The result perfectly reflects what I wanted from this shield list: winning through objective control and attrition, even when my opponent managed to destroy a large part of my army.
The Plaguebearers bought me time, the Rotswords held the centre, and Rotigus proved absolutely essential to maintaining my score.
We also managed to win the final round by a 24-point margin and finish the Letanía del Oso GT in 7th place.
A fantastic game against a great opponent and an excellent way to end the tournament.
See you on the battlefield!
Want more Age of Sigmar content?
Stats and Meta: Good Games Club
Follow us: The Generals Hub on Instagram
What would you like to see in future articles or videos? Share your ideas in the comments!

Descubre más desde The Generals Hub
Suscríbete y recibe las últimas entradas en tu correo electrónico.

The Generals Hub
Aquí encontrarás las últimas noticias de Age of Sigmar, mucho hobby, análisis del metajuego, estrategia y contenido para disfrutar al máximo del universo de los Ocho Reinos.
Leave a Reply