
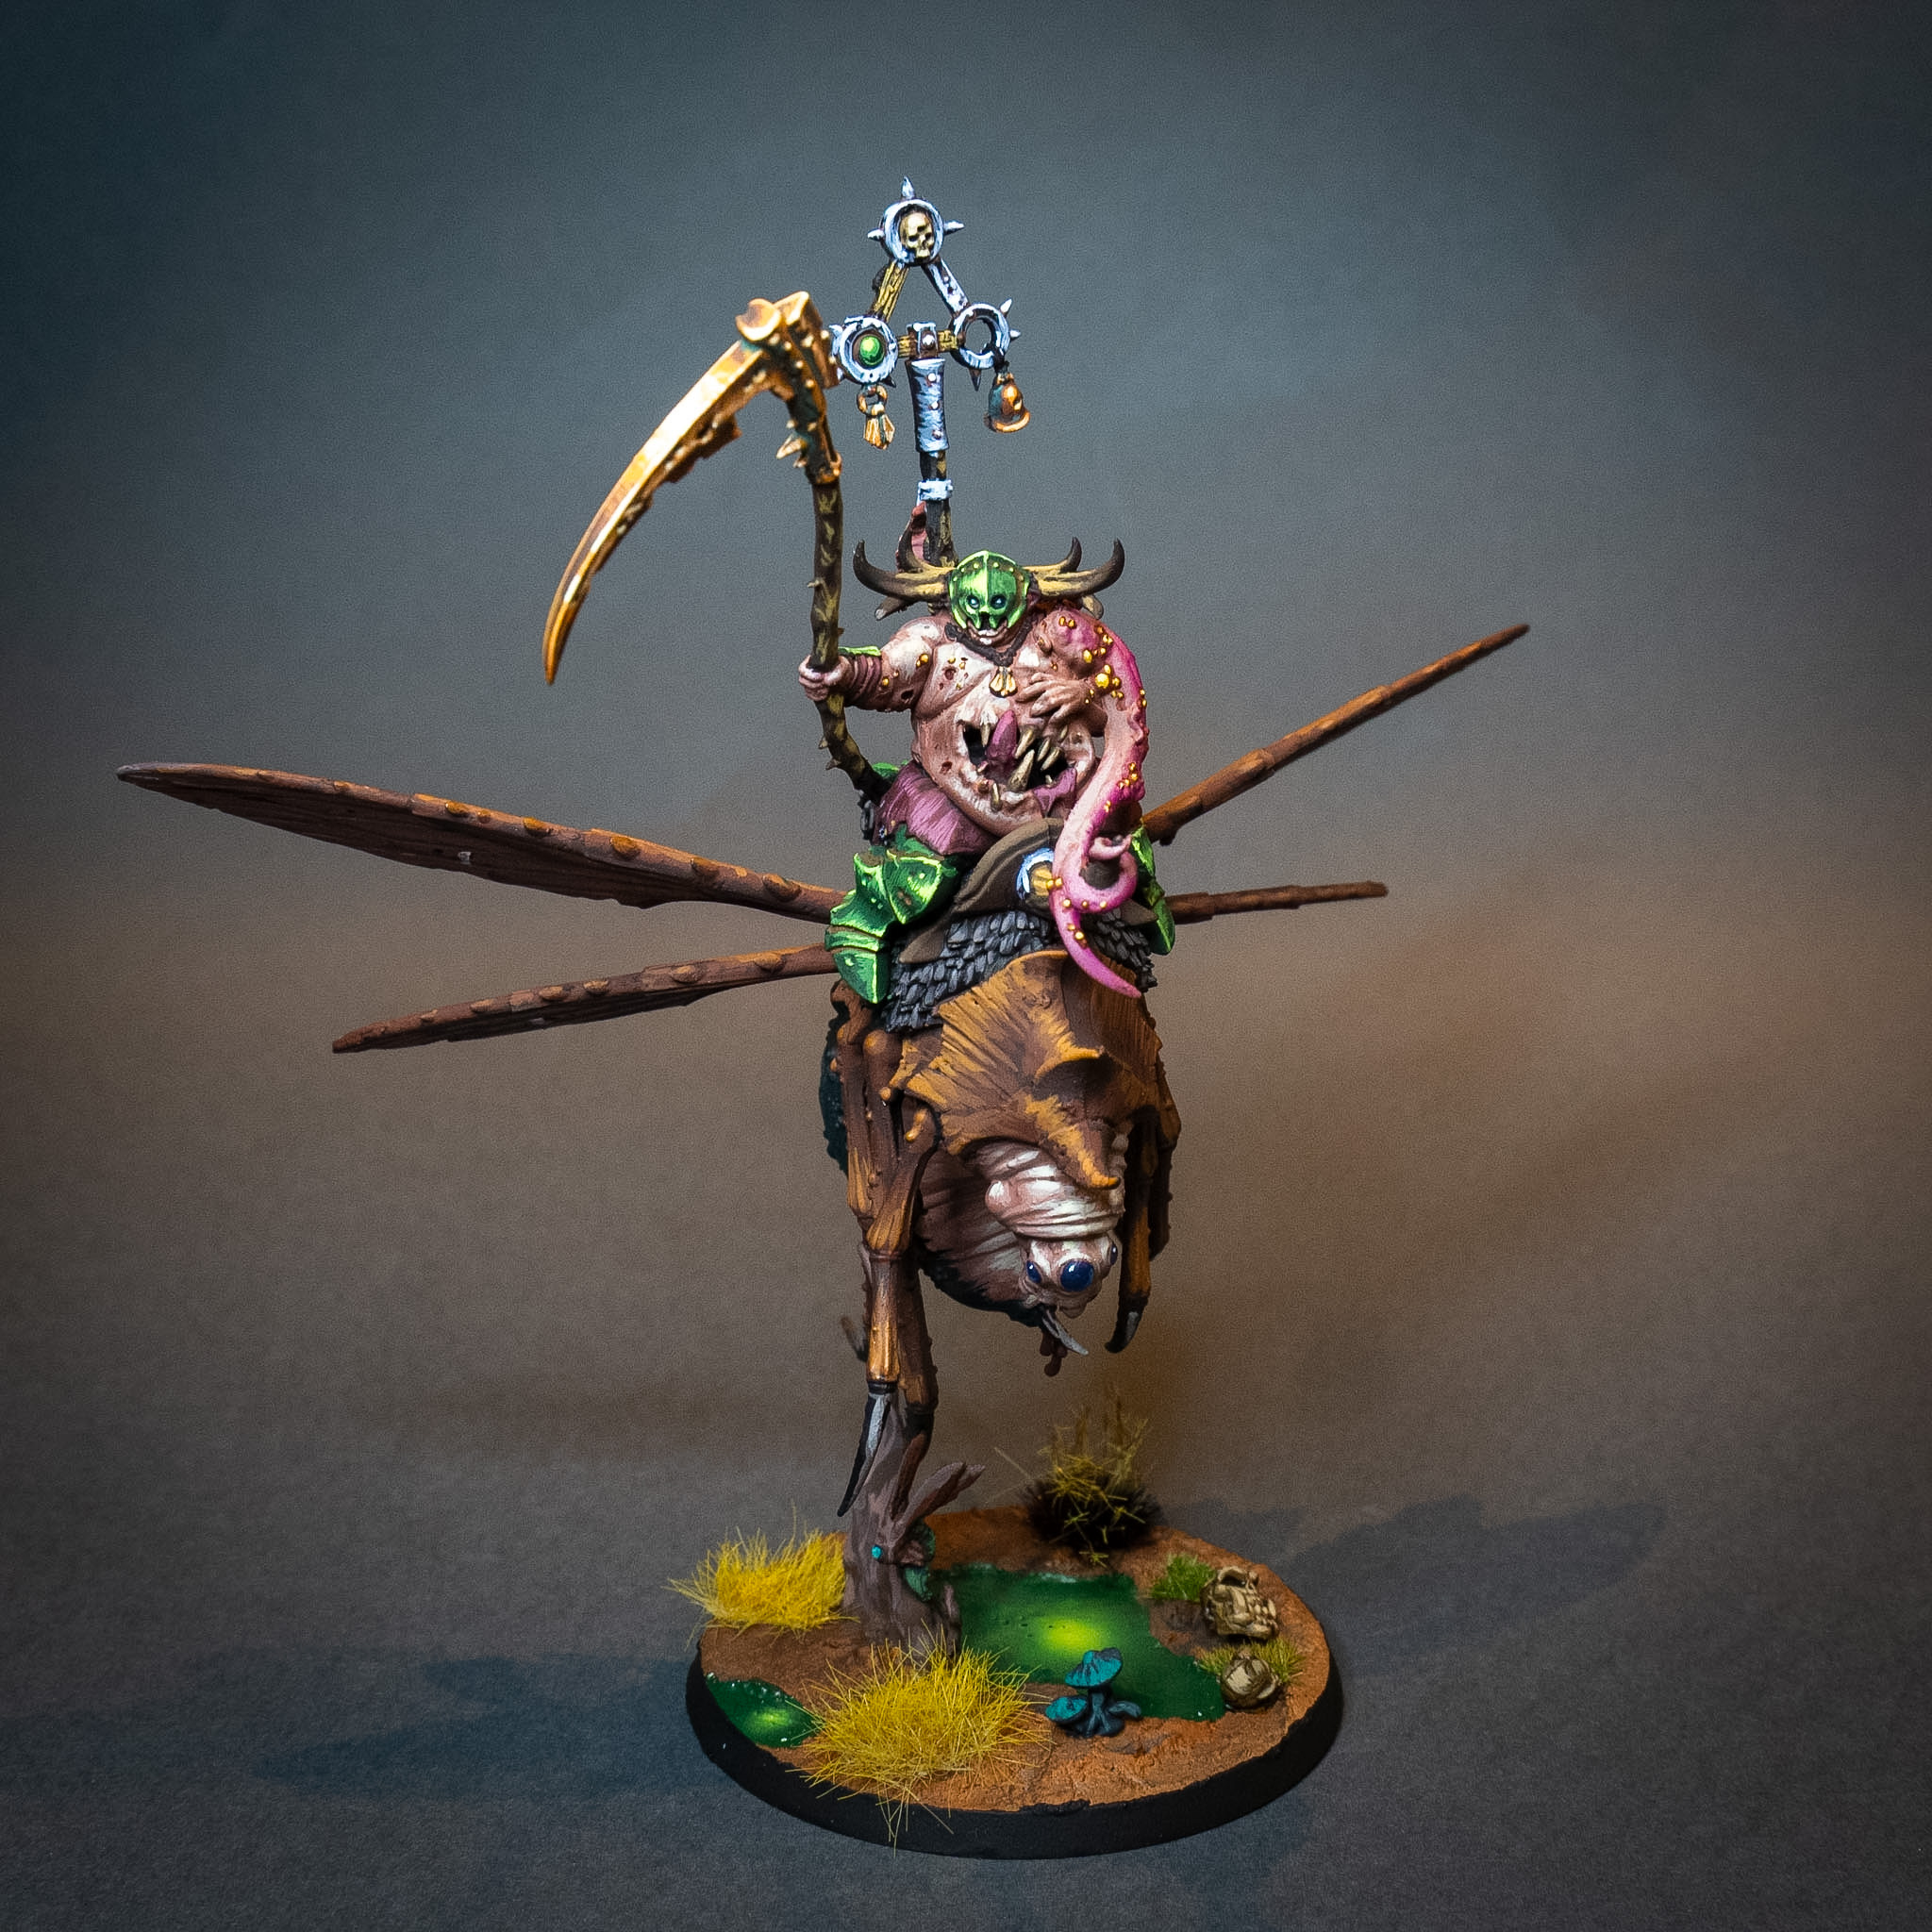
Painting Guide: Pusgoyle Blightlord Rider, Step by Step

Hi again! I’m Carlos P Jimeno, and we’re back with the second part of this tutorial for The Generals Hub.
In the previous article, we painted the Pusgoyle Blightlord fly and finished all the different areas of the mount. This time, we’re moving on to the rider, which has quite a bit more variety in terms of materials, colours and details, so there’ll be a few more sections to work through.
The philosophy is exactly the same as before: aim for a strong result on the tabletop using simple, repeatable recipes that we can easily carry across the rest of the army. You’ll also see some of the same mixes and colours coming back, which helps keep everything visually consistent without making life harder than it needs to be.
Before We Start
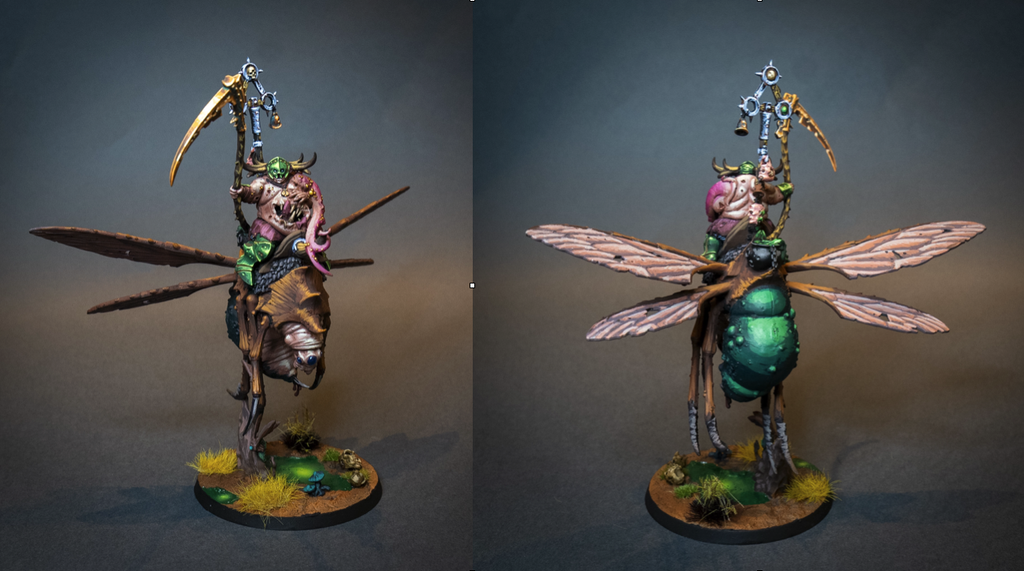
As in the first part, we’ll start with the miniature primed black and use the reference photos to see where the light naturally hits.
One of the tricks I use most to get miniatures looking great without spending forever on them is skipping a lot of glazing and blending. Not because those techniques don’t work, but because when I’m painting full armies, I’d rather spend that time getting more miniatures finished.
For me, the most important thing is placing the highlights well, defining the volumes and creating strong contrast. If those three things are working, the miniature gains a huge amount visually without needing hours of smoothing every transition.
That extra level of refinement is something I prefer to save for heroes, characters or special miniatures, where spending a bit more time really makes sense.
Rider’s Skin
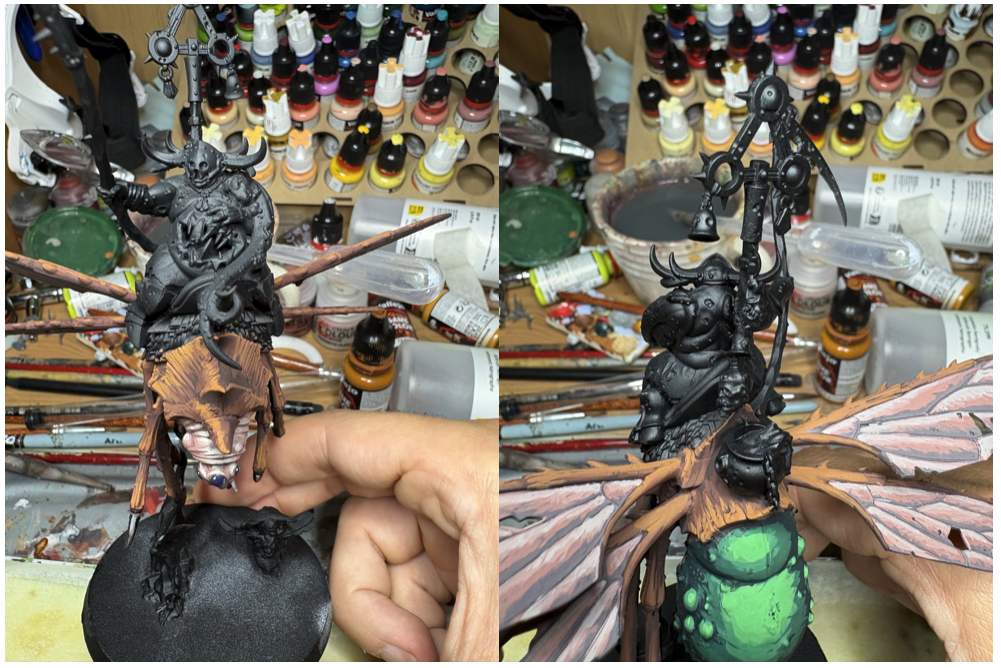
For the skin, we’ll reuse several of the tones we already used on the fly. Besides saving us from pulling half the paint rack off the shelf, it also helps maintain colour consistency between the rider and the mount.
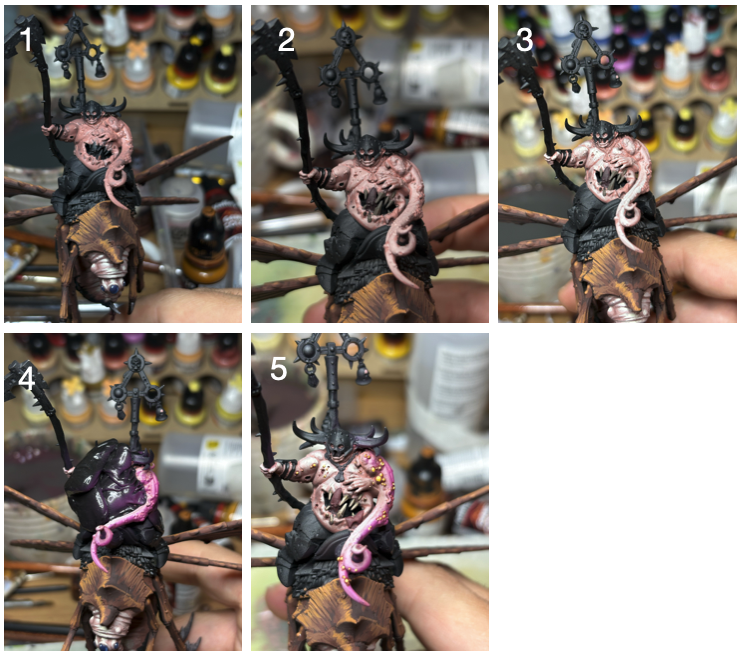
We’ll start with a fairly warm skin tone and gradually push the highlights lighter. After that, we’ll airbrush a very soft purple from below, mainly tinting the shadows and midtones without covering the highlights we’ve already built up.
To finish, the pustules will give us a few small pops of much more saturated colour, helping them stand out against the skin.
Skin
-
Bugman’s Glow – Citadel
Paint all the skin. -
2 parts Rakarth Flesh – Citadel + 1 part Bugman’s Glow – Citadel
Apply the first highlight, covering a smaller area. -
50% Rakarth Flesh – Citadel + 50% Bonewhite – Vallejo
Mark the main highlights. -
Bonewhite – Vallejo
Optionally reinforce a few points of maximum light. In this case, barely at all since we can hardly see the face. -
Purple – Vallejo Model Air
Mask the miniature and airbrush from below to tint the shadows and midtones.
Pustules
-
50% Agrax Earthshade – Citadel + 50% Red Ink – Vallejo
Apply the mix around the pustules to define them. -
Golden Yellow – Vallejo
Paint the entire pustule. -
Purulent Yellow – AK
Highlight the highest areas.
Belly Mouth
For the mouth, we’ll work on the teeth and tongue separately. For the teeth, I’m reusing a recipe I use quite often because it’s quick and works really well: a brown base, a fairly broad midtone, and a light final highlight.
For the tongue, we’re going for a much darker, more sickly tone, starting with a deep red and gradually pushing it towards a brighter pink.
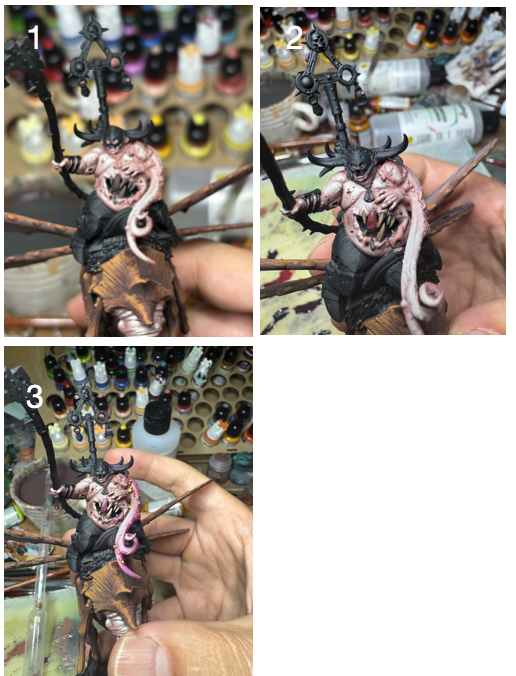
Teeth
-
Earth – Vallejo
Paint all the teeth with the base colour. -
Khaki – Vallejo
Cover most of the tooth, leaving the base visible in the deepest areas. -
Bonewhite – Vallejo
Mark the brightest highlights on the tips and most exposed areas.
Tongue
-
Night Red – Vallejo + a little Tenebrous Grey – AK
Paint the entire tongue with the base mix. -
Base mix + Squid Pink – Vallejo
Apply the first highlight. -
More Squid Pink – Vallejo
Repeat the highlight, covering a smaller area.
Armour
For the armour, we’re going for a dark, dirty green that feels very Nurgle, while still trying to give it a bit of a metallic feel with a simple NMM approach. We start with a fairly muted green, add some rust into the recesses, and then build the highlights up progressively towards a much brighter green.
Here, it’s especially important to think carefully about where the highlights go. Instead of brightening the whole armour evenly, we’ll keep concentrating them into smaller and smaller areas to reinforce that metallic effect. We’ll be doing a dedicated NMM post soon, where we’ll go into more detail on highlight placement, reading volumes, and using contrast to make the effect work.
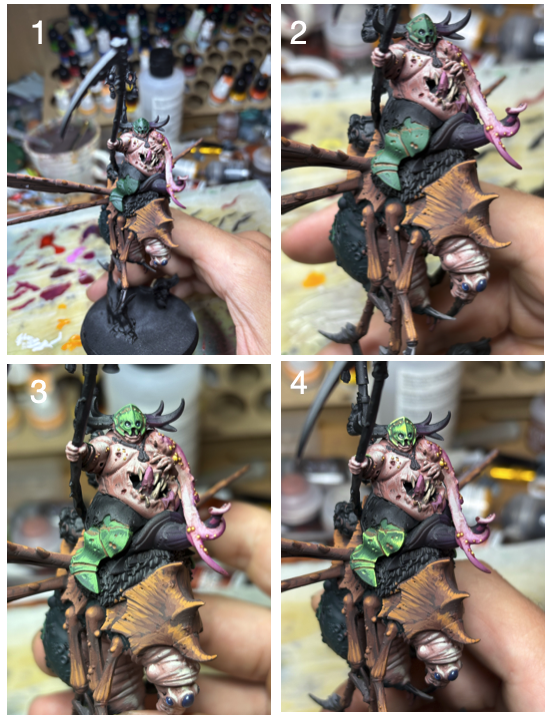
-
4 parts Dark Green – Vallejo + 1 part Filthy Brown – Vallejo + a touch of Tenebrous Grey – AK
Paint the entire armour with the base colour. -
Dark Rust – AK
Thin it heavily with water and apply it into the recesses to create a rusty, decayed effect. -
2 parts base mix + 1 part Bile Green – Vallejo
Apply the first highlight. -
1 part base mix + 2 parts Bile Green – Vallejo
Apply the second highlight, covering a smaller area. -
Bile Green – Vallejo
Mark the brightest highlight areas.
Clothing
For the trousers and the straps on the arm, we’re going with a very quick and simple recipe. We start with a dark red and gradually push it towards pinker tones, concentrating the highlights in the areas where we saw the light hitting in the black-primer reference photos.
There’s not much more to it: just a few well-placed layers, and it works really well.
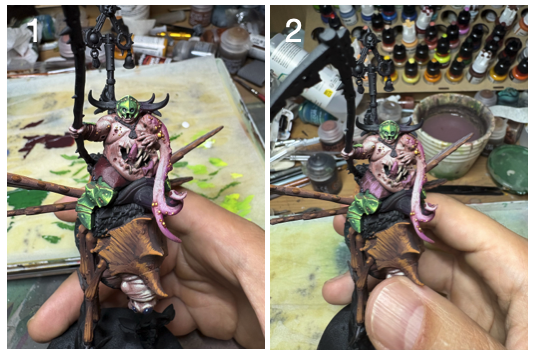
-
Night Red – Vallejo + a touch of Tenebrous Grey – AK
Paint all the fabric and straps with the base colour. -
Night Red – Vallejo
Apply the first highlight. -
Night Red – Vallejo + Squid Pink – Vallejo
Push the highlights on the most exposed areas. -
More Squid Pink – Vallejo
Apply the final highlights over a smaller area.
Wood
For the scythe handle, we’re going with a very simple and quick recipe. The key here isn’t using lots of layers, but clearly defining the edges and the planes facing upwards, as those are the areas that will catch the most light.
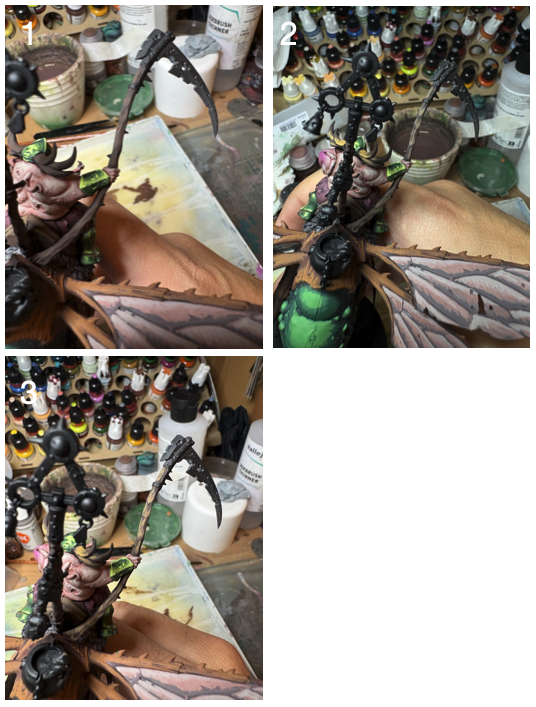
-
Charred Brown – Vallejo
Paint all the wood with the base colour. -
Charred Brown – Vallejo + a little Tan – Vallejo
Apply the first highlight, defining the edges and upper-facing planes. -
Tan – Vallejo + a touch of Charred Brown – Vallejo
Reinforce the final highlights on the most exposed areas.
Scythe
For the scythe blade, we’re going for a pretty dirty copper-style NMM, very much in keeping with the Nurgle vibe. We start from a dark base, add a rust wash to dirty it up even more, and then build the highlights with progressively warmer tones until finishing with a more yellowish point of shine.
As with the armour, the key here is thinking carefully about where those reflections go and reducing the painted area step by step so the metallic effect reads properly.
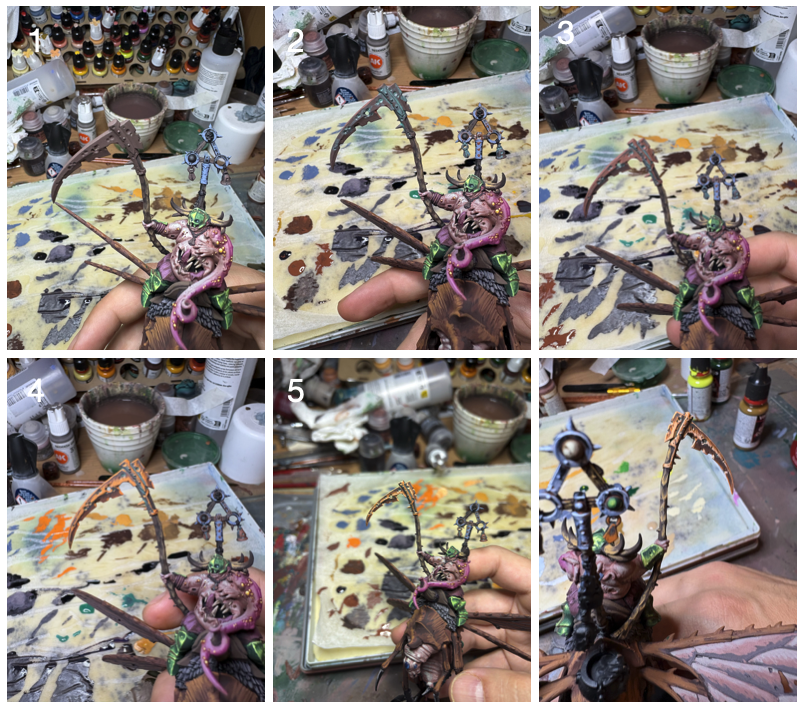
-
Dark Rust – AK + a touch of Tenebrous Grey – AK
Paint the entire blade with the base colour. -
Green Rust – Vallejo
Apply a wash to dirty up the blade and give it a more oxidised look. -
Dark Rust – AK
Bring back some of the highlighted areas over a smaller surface. -
Light Rust – AK
Build up the main highlights. -
Light Rust – AK + Ice Yellow – AK
Mark the final highlights on the brightest areas.
Banner Metalwork
For the banner, we’re going for a steel-style NMM, much colder than the other metallic areas on the miniature. We start with a dark grey, move up to a mid grey, and finish with a very light, slightly bluish tone.
The key here is to think carefully about the shape of each piece. On cylindrical areas, the main highlight should sit along the centre of the cylinder. On flat surfaces, we’ll focus the light towards the lower part of the plane and finish with the strongest highlights on the edges facing upwards.
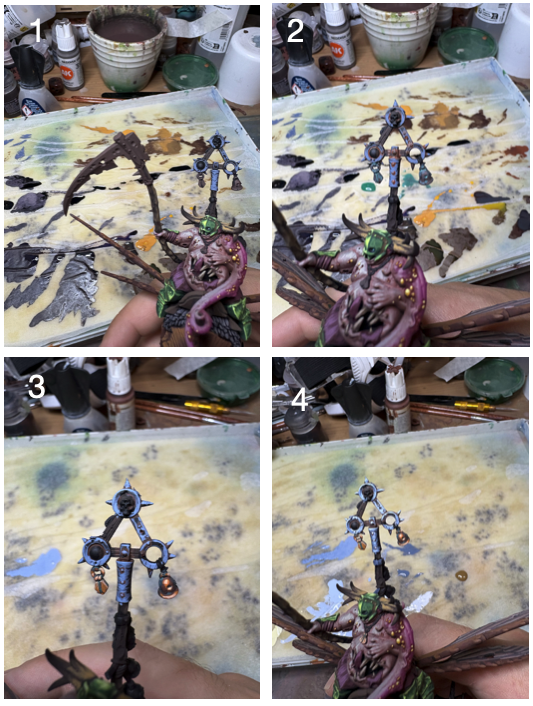
-
Shadow Grey – Vallejo
Paint the entire piece with the base colour. -
Steel Grey – Vallejo
Apply the first highlight according to the shape of each area. -
Glacier Blue – Vallejo
Mark the final highlights on the edges and brightest areas.
Banner Skull and Orb
To finish the banner, we’ll paint the skull and the orb. The skull follows the same simple recipe we already used for the teeth, helping keep the bone areas consistent across the miniature.
The orb, on the other hand, will be painted as if it were glowing from within: marking the main light area with a circle and adding a small line of light on the opposite side to reinforce the effect.
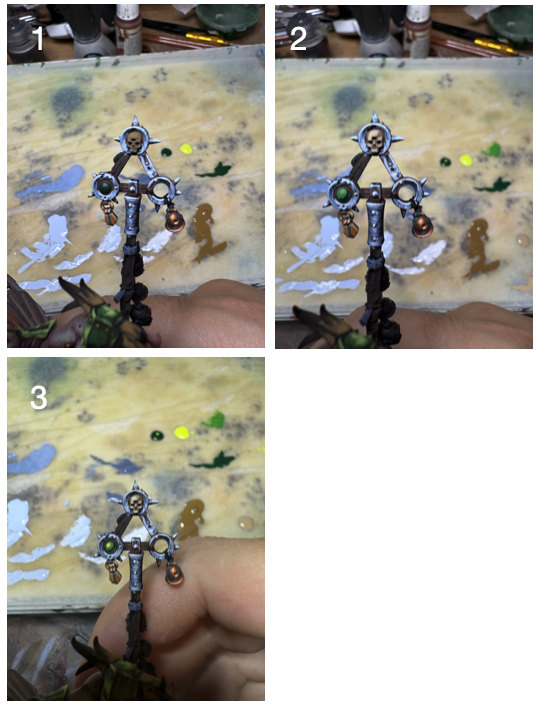
Skull
-
Earth – Vallejo
Paint the entire skull with the base colour. -
Khaki – Vallejo
Apply the first highlight to the areas facing the light. -
Bonewhite – Vallejo
Reduce the highlighted area and mark the final highlights.
Orb
-
Dark Green – Vallejo
Paint the entire orb with the base colour. -
50% Dark Green – Vallejo + 50% Bile Green – Vallejo
Paint a circle in the main light area and a line on the opposite side. -
Bile Green – Vallejo + a little Dark Green – Vallejo
Reduce the highlighted area inside the circle and reinforce the line on the opposite side.
Final Result
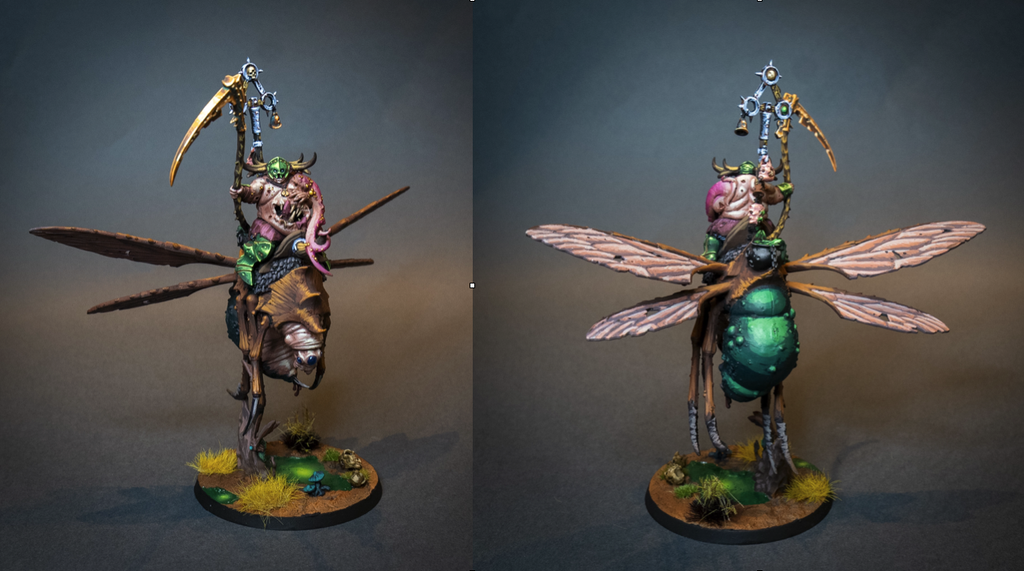
And here we have the final result after applying all the recipes and techniques we’ve worked through across both tutorials.
In the end, it all comes back to the same idea we talked about at the start: placing the highlights well, creating contrast and reusing simple recipes so the miniature has plenty of impact without spending forever smoothing every transition.
On this miniature, we’ve also played quite a lot with different materials and colour temperatures: warm skin, cooler greens, reddish fabrics and several types of NMM. All of that helps separate the different areas visually and gives the finished piece much more presence.
And the best part is that many of these recipes can be repeated across the rest of the army, which is exactly what we’re aiming for: coherent, great-looking units that are ready to hit the table without disappearing from the real world for six months.
If you try any of these recipes, have any questions, or just want to show me how yours turned out, leave a comment or come say hi over at @jimeno.minis.
Want to learn more about Age of Sigmar? Is there anything you’d like us to cover in future articles or videos?
Let us know in the comments! You can also send us your suggestions over on our Instagram.
Your feedback helps us keep creating the content you actually want to see.

Discover more from The Generals Hub
Subscribe to get the latest posts sent to your email.
Tags: maggotkin of nurgle

The Generals Hub
Aquí encontrarás las últimas noticias de Age of Sigmar, mucho hobby, análisis del metajuego, estrategia y contenido para disfrutar al máximo del universo de los Ocho Reinos.
Leave a Reply